OM System Revelations
The past few days have been quite revealing about the state of the OM System—some of these insights are public, while others are a bit more personal.
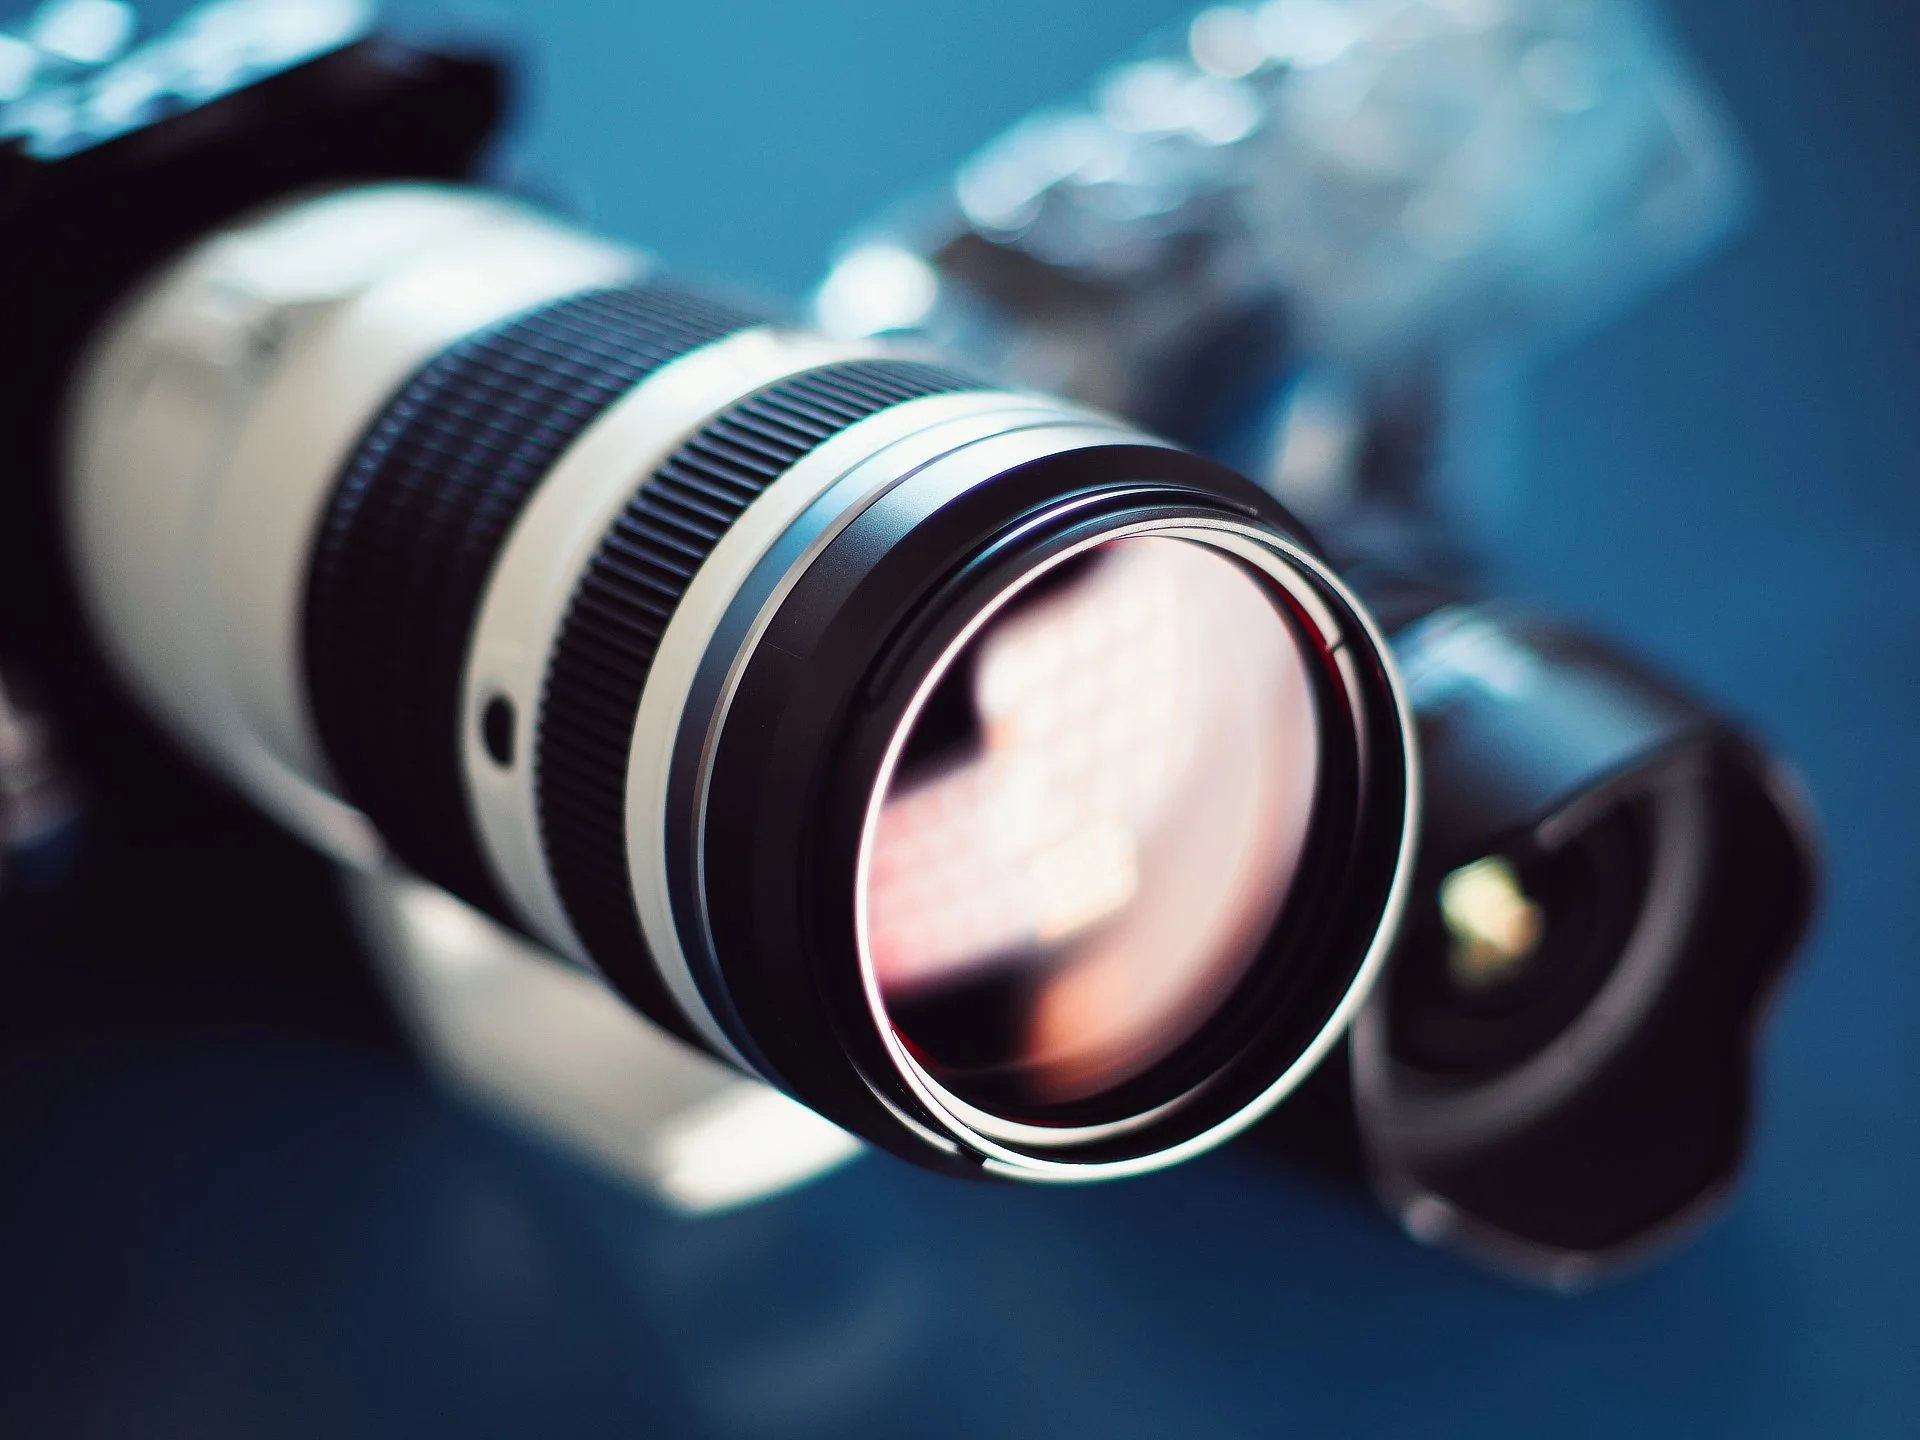
The M.Zuiko 50-200 f/2.8 PRO
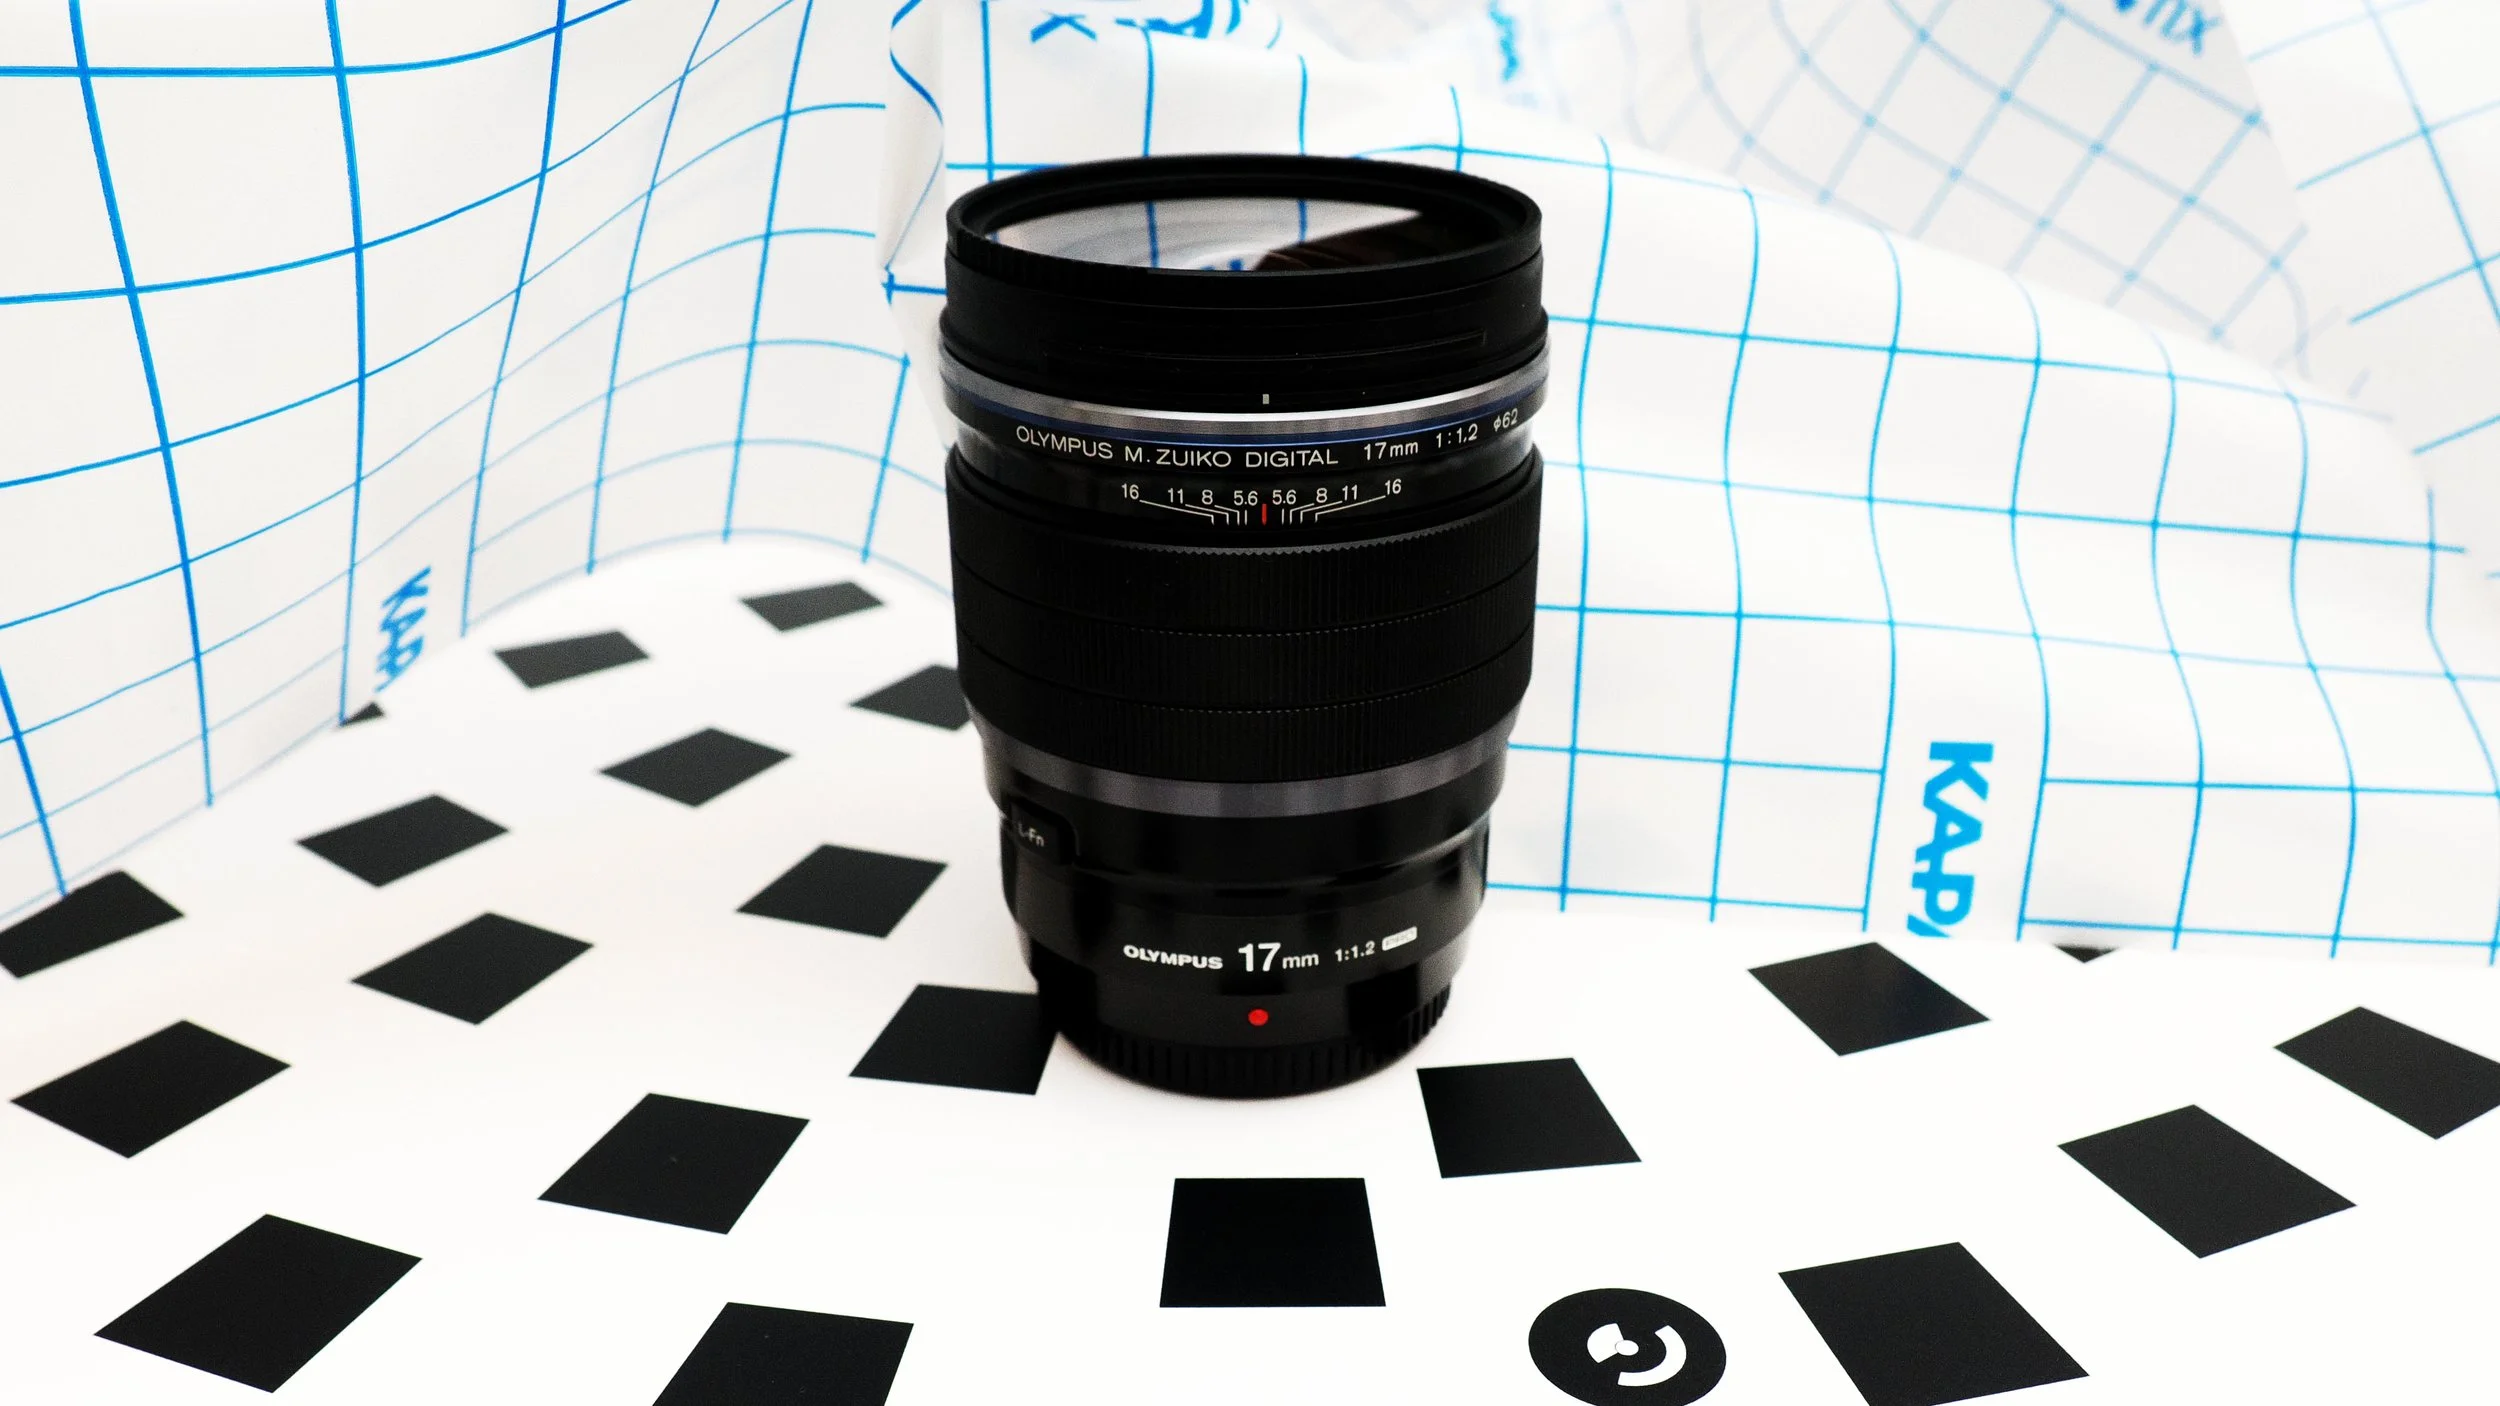
Let's begin with the elephant in the room: the new M.Zuiko 50-200mm f/2.8 PRO lens. I must first extend my sincere thanks to the team at OM System, as I am once again among the fortunate few to have early access to this highly anticipated telephoto zoom. And believe me when I say, it lives up to the hype. While I'm still completing my full battery of tests, what I've seen so far is not just promising—it's groundbreaking. This new lens, which I'll simply refer to as "The APO" for the rest of this post, is a near-perfect optical instrument with flawless apochromatic corrections.

“The APO” as seen from the photographer’s perspective.
From my initial impressions, this lens stands in a class of its own. It's not just a technical marvel in terms of resolving power, aberration correction, and color rendition; it also feels like a spiritual successor to the legendary Four Thirds Top Pro lenses. The optical quality, robust build, and premium price point truly bring back those classic Top Pro vibes. This is a moment I've been waiting for, and it's nothing short of a revelation. Stay tuned for my in-depth review—I promise it will be equally revealing.
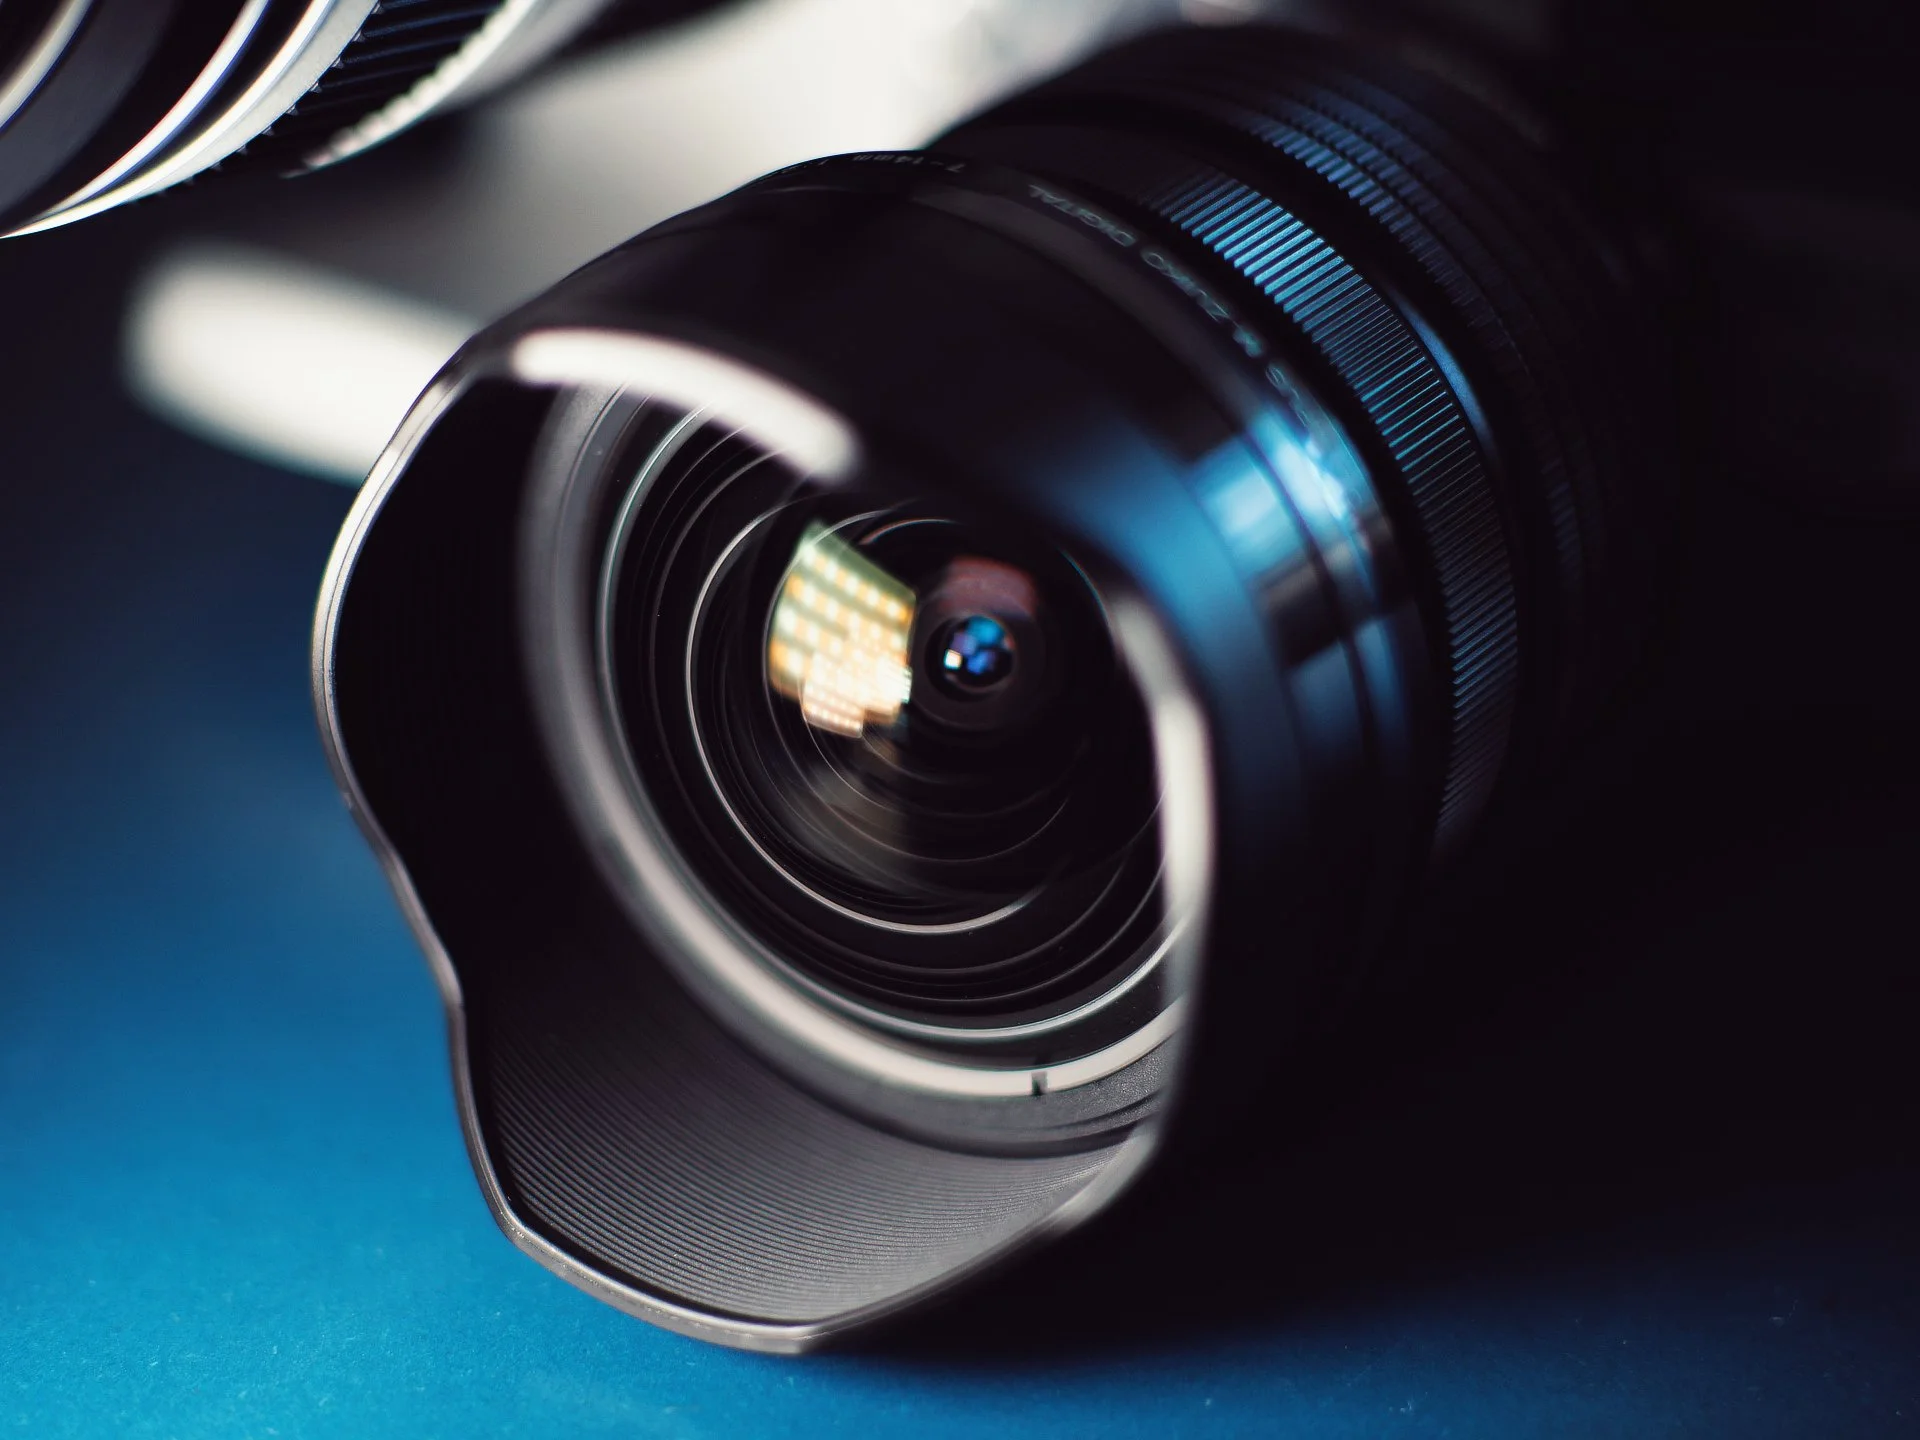
Back from the dead: My M.Zuiko 7-14 f/2.8 PRO.
Now for a more personal OM System event: I've done it again. I dropped a lens—this time, my beloved M.Zuiko 7-14mm f/2.8. A fantastic, high-performance lens that I use constantly. Unfortunately, "dropped" is an understatement; in my clumsy attempt to catch it, I accidentally threw it across the room. Shortly after this incident, the mechanical shutter on my OM System OM-5 failed at 44,000 actuations. While that might not sound like many, this camera has been through some incredibly rough conditions, and it seems I was just a bit unlucky.
My “brand new” OM System OM-5 Mark I.
Thankfully, being an OM System PRO Service member gave me hope. And here comes my second revelation: Both the lens, which I had written off as a total loss, and the OM-5, which was still under its two-year warranty, were repaired. In under seven days, including shipping time, their internal components were completely replaced. Both items came back to me like new, perhaps even better, after being personally inspected by an experienced technician. This experience was a stark reminder of why, for me, there is no other option on the market.
OM System forever, and I'll see you soon for my review of "The APO."
A Glimpse Ahead: My Commitment to Quality
You might have noticed a quieter presence from me online recently, but these weeks have been anything but quiet for me. In fact, I've been working intensely behind the scenes.

My current endeavors encompass three distinct yet interconnected areas of professional focus.
Firstly, as a professional reportage and editorial photographer, I am fortunate to have a full schedule of creatively and technically demanding assignments.
Secondly, as an art photographer, I am actively refining my artistic vision following a successful underground exhibition in Vienna, with the aim of pursuing exciting new opportunities.
Thirdly, and of significant importance, I serve as a technical expert and specialist author within the imaging field.
While the synergy between these roles has been beneficial, it also highlighted the need for a more strategic and sustainable workflow. This period of focused offline work allowed me to sharpen my strategic vision, conduct crucial research, and build momentum for my future endeavors, particularly in my role as a technical expert.
I'd like to express my sincere gratitude to everyone who continues to support my work through donations, purchases of my digital publications, and loyal channel membership on YouTube. Your dedication is the fuel for my passion. A heartfelt thank you!
While I'm eager to share the outcomes of this restructuring, I know it's not yet the right time for a full reveal. What I can share at this point is that my core philosophy moving forward will center on an uncompromising dedication to quality over quantity, with a focus on mastering photography not only as a craft but as a state of mind – a mastery I aim to reflect in the value I provide to you.
Is the OM System OM-3's 8-bit Footage "Soft"?
Some reviewers have suggested that the OM System OM-3's 8-bit movie capture using the H.264 codec produces soft footage. Is this true?
The short answer: No. For the longer answer, please continue reading.
The Test
For this controlled test, I set up a high dynamic range studio scene illuminated by two high-end LED panels. The following base settings were used:
OM-Log400
4K 3,840×2,160
L-GOP
Exposure was set so that the LED light on the right is mostly below an IRE of 109 - measured by the OM System OM-3 internally.
I captured the exact same scene with these settings using both the H.264 8-bit capture and the H.265 10-bit capture.
The Results


Comparing the footage revealed the following:
There is no difference in sharpness or resolution.
The tone and color response is slightly different – this is intentional as OM-Log400 utilizes different color gamuts depending on the set bit depth and codec: H.264 uses P3-D65 and H.265 uses BT.2020
Both capture options deliver excellent tonal transitions and high quality needed for professional applications.
Closing Remarks
The differences some reported most likely stem from not using the exact same settings (e.g. leaving the image stabilizer on), conducting a test under non-laboratory conditions, some post-processing-related error in the test workflow, or a firmware issue with the specific camera tested. Note that the latter is quite unlikely but was mentioned for the sake of completeness.
Addendum
The OM-3's advanced picture profiles (OM-Log400, HLG, Flat, OM-Cinema1, and OM-Cinema2) are designed to provide only a base level of sharpness, giving editors more flexibility in post-production. Ready-to-use footage with high acutance can be captured in 8-bit H.264, utilizing the standard Picture Modes.
To demonstrate this, I recorded a simple test scene illuminated by the worst low-quality flickering light source I could find. The footage was exposed at ISO 800 with a mid-range lens at its widest aperture, with the camera in hand.
Using the Natural picture profile with the OM-3 set to 4K capture, the resulting footage was nevertheless crisp and sharp, impressively showcasing the camera's sophisticated sharpening algorithms.
Picture Profile Natural, H.264, 8-bit in 4K
Exhibition: Thomas Eisl x Yara Mar at SMArt Café Vienna
United by our shared passion for pushing boundaries, Yara and I have joined forces for our first collaborative exhibition. We are delighted to offer you our raw and unflinching photographic perspectives.
Come as you are. Whether you are seeking art, coffee or something a little more kinky, we’ve got you covered.
Opening Reception:
20:00, December 6th, 2024
SMArt Café
Köstlergasse 9, 1060 Wien, Austria

Yara Mar’s “Mystery and Mastery / Mysterium Coniunctionis” combines portraiture with polarity. With subversive sensuality and embodied experience, she challenges traditional concepts and celebrates the power of the feminine.
Thomas Eisl stages erotic nudity as an aesthetic experience between art and obsession. The viewer is provoked to scrutinize their own perceptions of sexuality.
Testing the M.Zuiko f/1.2 PRO Series
Many of you have been eagerly waiting for my long-announced reviews of the M.Zuiko PRO Series f/1.2 lenses. I’d like to provide an update on my progress behind the scenes.
Too Good to Be True
Having tested the ultra-fast f/1.2 PRO series lenses for nearly a year now, I’ve discovered many things: beautiful character, superior handling and a level image quality that’s truly unprecedented. In fact, it’s this latter characteristic of the f/1.2 M.Zuiko’s that has delayed my review. The lenses consistently outperform even the most sophisticated high-end optical test setup.
A new level of lens design: The M.Zuiko 17mm f/1.2 PRO.
Playing Catch-Up With Perfection
To give you an idea of the challenges I’ve faced, here are a few examples:
Resolving Power: While attempting to measure the peak resolving power of the M.Zuiko primes, I discovered that the f/1.2 lenses are so sharp that cars passing by on the streets four floors below my studio were enough to disrupt the test results. Even worse, my cat moving around in the next room had a detrimental effect on the measurements, despite the high-precision target being illuminated by flash with exposure times well below 1/8000s. This is a testament to their extraordinary performance, and I'm still struggling to fully comprehend the levels I'm witnessing.
Longitudinal Chromatic Aberration: My previously successful longitudinal chromatic aberration test setup was not accurate enough to examine the almost imperceptible focus shift at different wavelengths exhibited by these lenses.
MTF Charts: The M.Zuiko lenses have even outperformed my very expensive full-frame MTF charts. Measurements revealed the imperceptible bumps of the paper, obscuring the minuscule sharpness fall-off of the f/1.2 primes.
Even without sharing any specific measurements yet, these challenges alone highlight the exceptional performance of the M.Zuiko f/1.2 PRO lenses.

Can’t see any bumps here? That’s because you are not an M.Zuiko f/1.2 prime lens.
Way Ahead
I'm now working with another industry-leading international lab to create a never-before-seen test chart printed on metal plates. I'm confident that this will allow me to finalize the remaining tests and provide you with insights into the unprecedented performance of these 21st-century optical marvels.
It goes without saying that this is a significant financial investment, and I rely on community funding to provide you with high-quality information. Please consider contributing via the link below.
The OM-5
Is the OM System OM-5 the ultimate travel reportage camera or just a 2022 re-release of the Olympus OM-D E-M5 mark III?
One thing is for sure – there are three remarkable features of this camera which are often overlooked.
The Processor
Introduced for the Olympus E-M1 mark III flagship model, the TruePic IX processor was originally intended to work with the high power battery pack BLH-1. Nonetheless, the OM System engineering team managed to make it work with the much smaller BLS batteries the OM-5 is using. Don’t forget that these where initially intended for E-400 series DSLRs and PEN cameras.
The Handling
What I also learned to appreciate is the grip design. Although the hand grip appears to be very small at first glance, it is actually very comfortable in practice.
When it comes to cameras, how buttons and dials feel and how the shutter sounds are very important to me. I immediately noticed two attributes: First, the precision and mechanical feedback of all control elements and the dampened shutter sound. Especially the latter was very noticeable to me.
The Viewfinder
One of the most important aspects of a camera is its viewfinder. On paper, the OM-5’s viewfinder is not really spectacular, but for the serious reportage photographer it is a potential game changer in practice: It offers a high eye point that outclasses even the legendary Nikon F3HP.
For people with glasses, it is a relief to be able to work with the camera without taking them off or having to scan the frame with the eyeball.
Even when you are not wearing glasses, the possibility to view the whole viewfinder at one glance is just very convenient.

Viewfinder eye points compared: OM System OM-1, Nikon F3HP, OM System OM-5.
Lackluster New Cameras?
What do the Nikon Z6II, the Pentax K-1II, the OM System OM-5 and the Canon 5D Mark IV have in common?
They were all lambasted for being lackluster updates of their predecessors.
So are camera makers trying to sell you minor upgrades for big money or is there another side to the story?
Read the article or watch on YouTube to find out.
The „New Camera Model” Dilemma
Fifty years ago, it was a testament to a product’s quality and overall design when it remained in production unchanged for a long period.

Take the Nikon F3 for example. Released in 1980, this professional SLR remained in production until 2001. When Nikon finally retired the model after 21 years, at least 750.000 bodies had been sold.
But with digital photography, consumer perception changed drastically: When manufacturer A releases fewer models than manufacturer B, it seems to be common internet wisdom that A is “dead”, in serious trouble or at least running out of ideas. Manufacturers are therefore more or less forced to release new products, even though the old ones are still perfectly fine.
Diminishing Returns
To make things even worse, manufacturers are dealing with the problem of diminishing returns when it comes to camera development.
In order to improve a camera like the Nikon D5, for example, an exorbitant amount of money for development is needed, with no guarantee that the improvements will be significant enough to convince new buyers.
So even if the engineers manage to improve an already near-perfect model, the new camera will not really be all that different.
That is exactly what happened in case of the Nikon D6: Like the D5, it still is a lighting-fast camera, it still has incredible high ISO performance and it still is indestructible. On top of that, the autofocus was improved significantly, but no one really took note of that, as the D5 was already practically infallible.
It is important to understand that major breakthroughs in physical engineering are far less likely to happen and if they do happen, they often go relatively unnoticed.
Always keep the Pareto-principle in mind: An improvement of 20% requires 80% of total development resources and is neither needed nor noticed by 80% of all users.
The “New Software” Dilemma
We photographers are used to receiving free firmware updates for our cameras. In general, we are not willing to pay for firmware updates even if they introduce new features.
Because of that, manufacturers only have three options:
Option 1:
Pricing their cameras higher to cover the costs of future updates. You’ll see this strategy usually with higher-end cameras.
Option 2:
Cutting production costs. I personally would not appreciate this course of action, as there is always some sort of trade-off in terms of build quality.
Option 3:
Producing a model in smaller quantities, and after the batch is sold, releasing a practically identical model but with improved software.
Every manufacturer has a different approach, which can also vary from camera to camera in their line-up. It is just important to not get disgruntled when a seemingly minor update requires you to purchase a new camera.
Conclusion
The "New Camera" and "New Software" dilemmas are fundamentally manufacturer concerns, not consumer concerns. So why should we even think about those?
First and foremost, it helps us to see through the hype that surrounds every camera release. It always sounds like the new model is now fundamentally different, and of course, manufacturers have to do that. But in reality, even breakthrough technologies offer only very limited practical benefits as our cameras are already highly capable.
Second, it helps us to avoid frustration when it looks like our favorite camera manufacturer released a seemingly lackluster new model. Because in reality, they have already designed a camera years ago that is so good that there was only very little to improve.
Third, it helps us to focus on the most important task: Truly mastering the camera we already own and advancing our photography skills.
That is how I stopped worrying and learned to love my camera.
From Print to Digital to Oblivion
This year, the major German-speaking photo magazine Color Foto switched from print and digital to digital only. They called it the right step in light of declining print sales, I call it closing shop.
A Trip Down Memory Lane
The magazine was first published in 1971 under the name “Color”. Unlike other German-speaking publications back then, the magazine focused predominantly on color photography, which was still consider amateurish. Circulation peaked in 1987, with 100.000 copies.

The first issue.
Most notably, the magazine almost always featured nudes on the cover photo and frequently included articles on nude photography. About 1990, things started to change and the magazine shifted more towards technical topics like lens and camera reviews. Humans – both with and without clothes – were seen less and less on the covers and pages.
It is no coincidence that from 2000 one onwards, with the so-called digital revolution, almost everything was only about technical aspects and less about aesthetics, catering specifically towards photographers enamoured with ever growing megapixel counts and ISO sensitivity ranges.
Irony
The discontinuation of Color Foto is not an isolated case, and the last 10 years saw a steady decline in available print publications.
It is quite ironic that after they switched from human form to digital bits and bytes, the latter actually killed them off, as they could not compete with free articles on the internet successfully.

Color Foto - from boobies to bytes.
Save Print!
When travelling, I always appreciated getting an issue of Color Foto or similar magazines from the news stand at the airport or train station. Sitting on a plane or train is just the perfect situation to read something actually printed on paper rather than swiping through endless streams of social media posts.
At the end of the day, it all comes down to consumer behaviour, and I strongly encourage you to purchase a printed magazine when you spot one that catches your eye. Because what would be the world without them?
MTF Test Chart – Final Destination
All good things come by three – this seems to be true for test charts as well. After the unusable Forex chart and the large batch of paper charts with compression artifacts, I’ve got some great news:
The third run of test charts is now suitable for providing accurate MTF measurements!
A Few Details
The new test charts are printed on 200g/m2 matte paper and exhibit very high edge acutance.
In order to allow the testing of optical systems from wide (around 20mm) to very long focal lengths (up to 600mm), I ordered three different chart sizes: A2, A1 and A0.
According to my calculations, a printed test chart has to be at least A2 to allow for reasonably accurate MTF measurements.
Just to illustrate, when testing a 600mm lens with a 35mm imaging system, the required distance to the test chart is around 10 meters. Therefore, a big – or to be more precise: a long - studio is required to test such an imaging system.
In any case, even if I would have preferred to work with charts smaller than A2 in order to reduce the working distance when testing such long focal lengths, this wouldn’t have been feasible as the accuracy and validity of the results would have suffered.
As I’ve written before, the bigger the test chart, the better, as the impact of aliasing effects present on the test chart (inevitable) then carry less weight.
Way Ahead
Although it does not sound like much, the solution of the test chart issue is a big step in the right direction.
I’ve already got a long list of things I want to test besides lenses. For example, have you ever wondered how much a UV filter reduces the resolving power of your highßend lens? Well, I certainly have and now I can measure it and share the results with the world.
Stay tuned!
MTF Test Chart – A New Hope
In my previous blog post, I described the quality issues I had with the first MTF test chart printed on Forex. A few weeks later, the replacement paper charts arrived – unfortunately they are also unusable.
Upon closer examination, I noticed that the JPEG compression algorithm (Lanczos-3, in this case) added an outline to the trapezoids used for calculating the modulation transfer function.
Double edge = two bumps on the MTF chart.
Again, much like the lack of edge acutance of the Forex chart, the defect is barely visible to the naked eye, but would influence the lens- and camera test results.
The replacements are already ordered, this time I’ve sent the printer a PDF file instead of a JPEG and I’ve double-checked the edges.
What to do with 100 sheets of high quality prints sized 120x85cm? Well, I’ve got a decent supply of very expensive wrapping paper for the foreseeable future.


MTF Test Chart – Quality Control
I recently ordered a custom made test chart from a reputable photo lab for measuring the modulation transfer function of various imaging systems to provide unbiased, highly accurate data for future articles here on the site and on YouTube.
Bottom line upfront: The quality of the chart was not sufficient, and here is how I found out:
The Chart
The rule of thumb is: The bigger the test chart, the better the results. I therefore ordered a chart sized approximately 85x60 cm printed on Forex.

The Forex-chart.
And there is the rub – Forex is essentially fancy plastic and it has a slightly structured surface. This negatively impacts acutance of the black trapezoids, which serve as the slanted edge targets. The effect is almost not visible to the naked eye, but under the linen tester it was very obvious.
So I already knew that the chart won’t suffice, but I decided to test how big of an issue it was in practice.
The Test
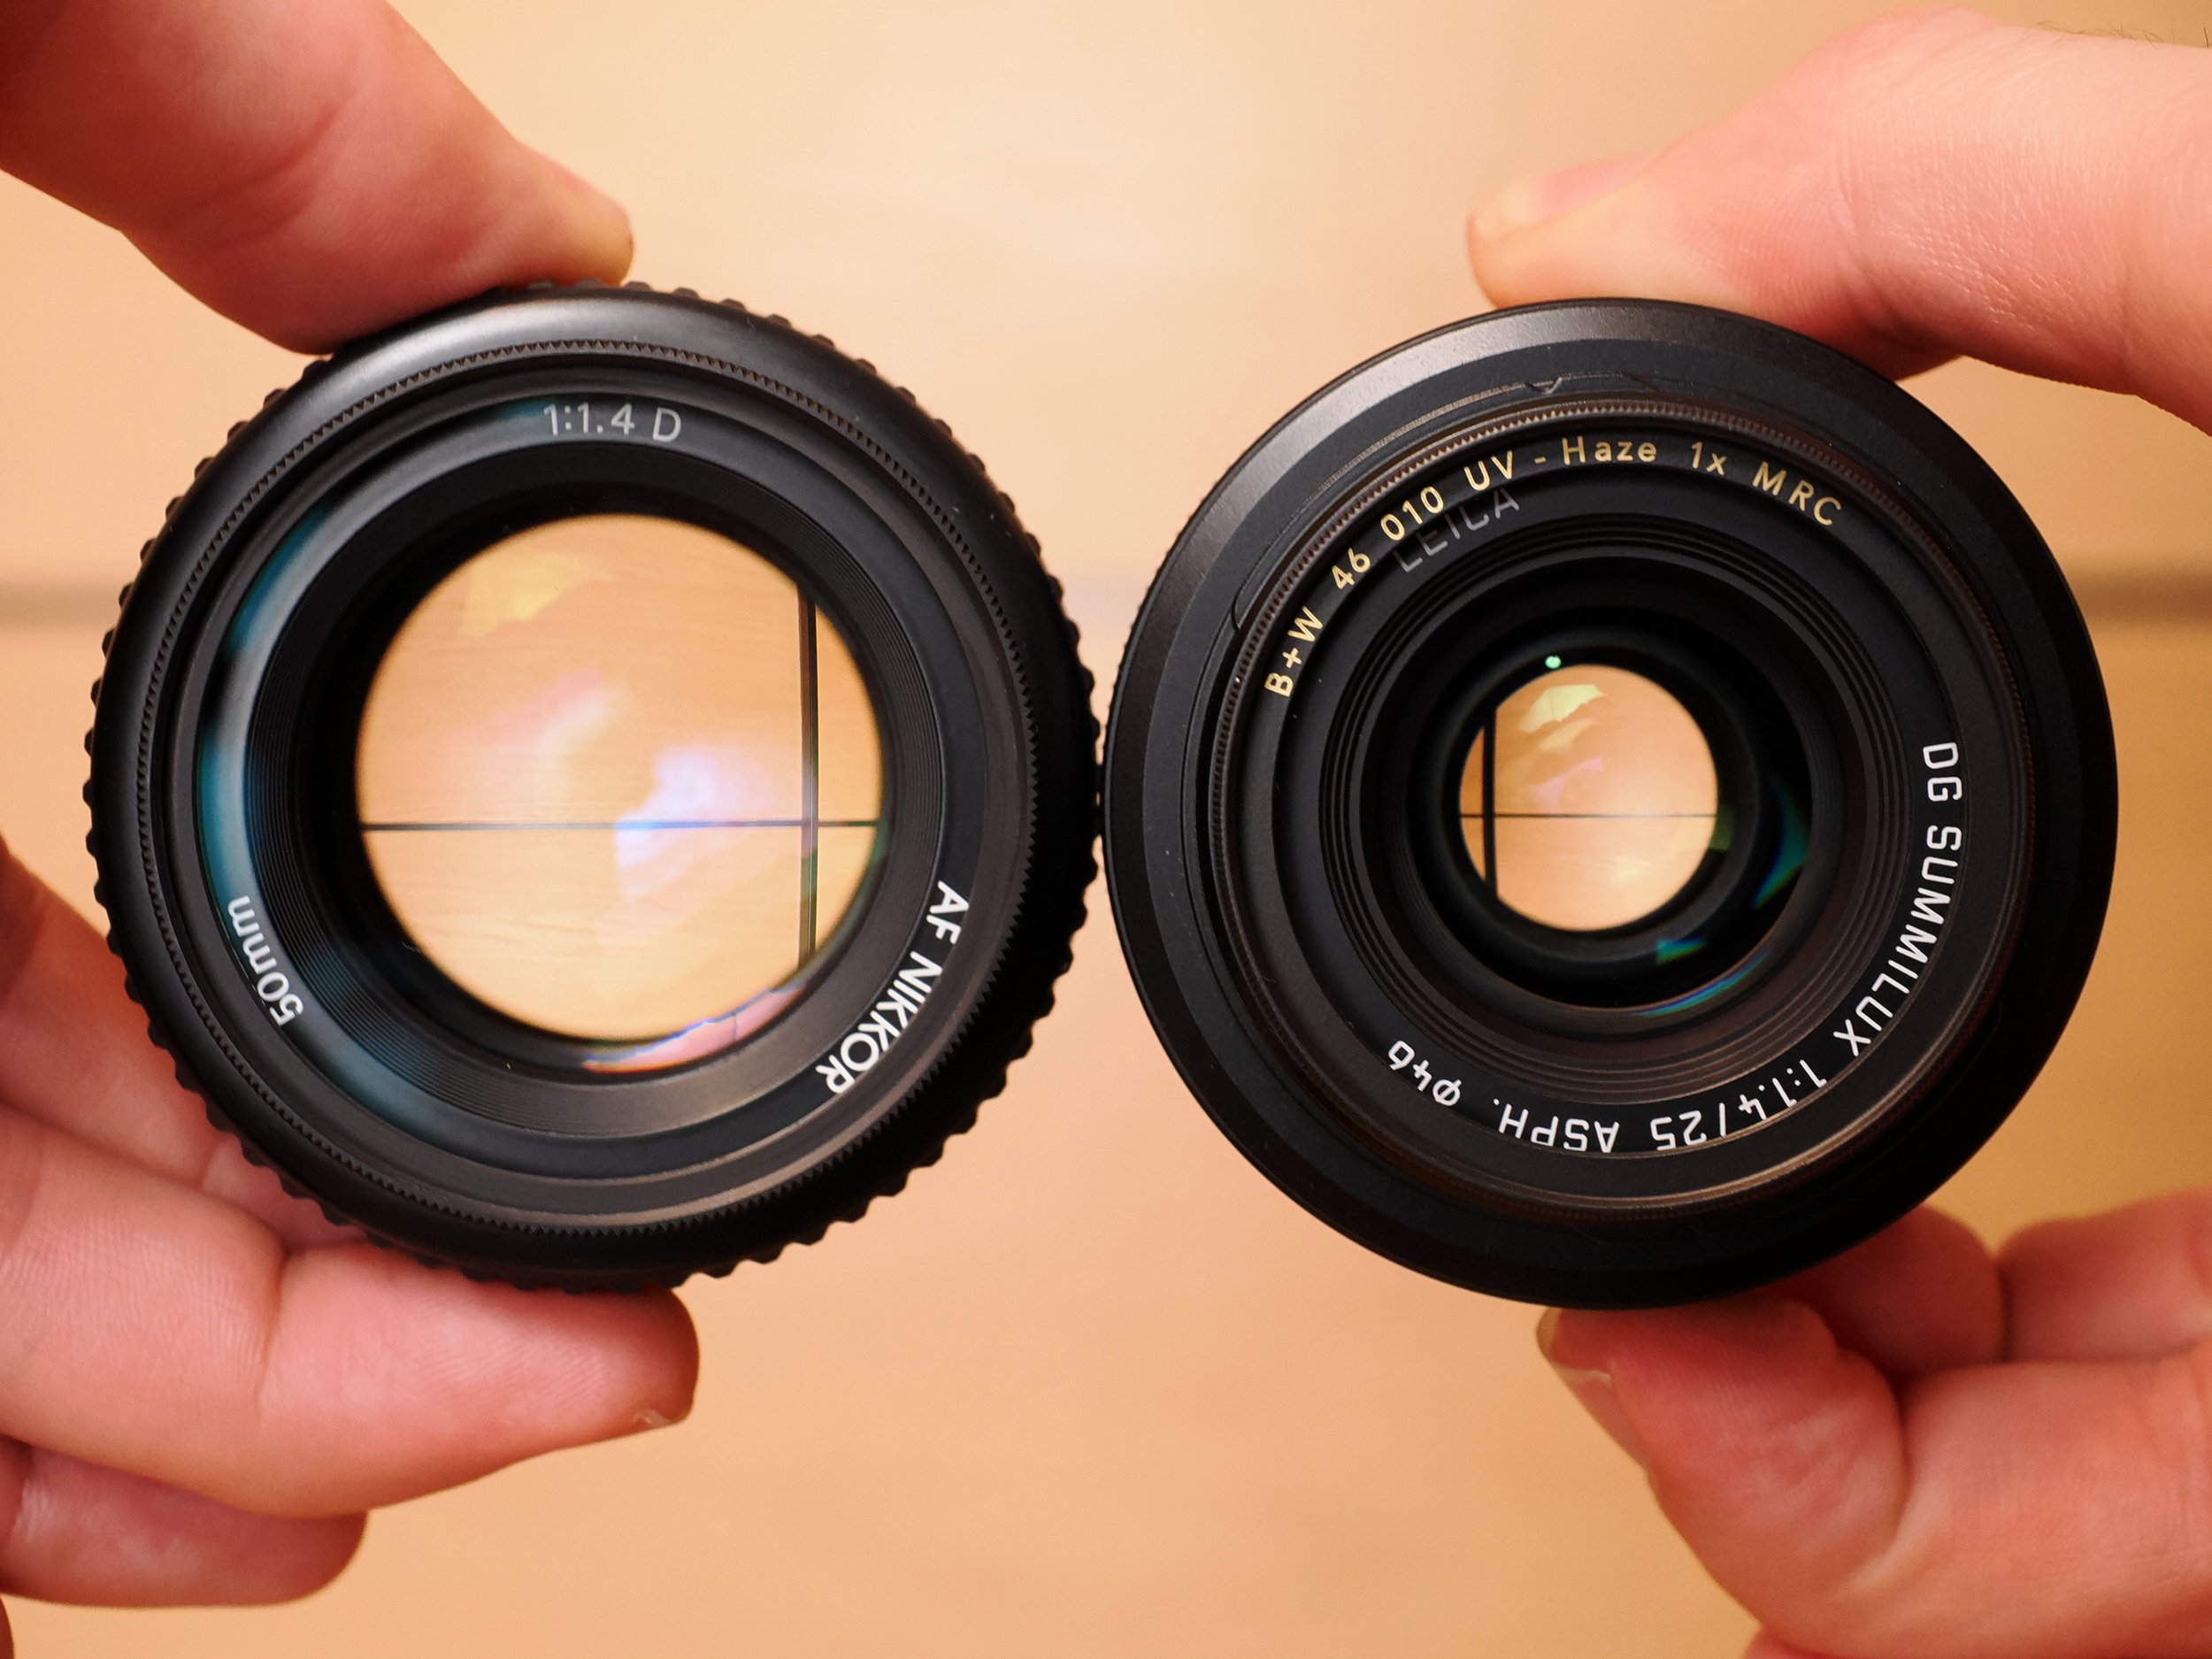
For the test, I photographed the chart with an OM System OM-1 + Leica DG Summilux 25mm f/1.4 from various distances and compared the cycles per pixel-values of the same group of test patterns across the various photos.
The RAW files were processed in MakeTIFF to create a linear, relatively “untouched” TIFF.
MTF Mapper was used to calculate the following MTF values in cycles/pixel.
Distance to chart: 100cm
Distance to chart: 150cm
Distance to chart: 250cm
Evaluation
With increasing distance, the MTF values increased as well. This is indicative of poor test chart quality, and here is why:
The further the distance from the chart, the smaller the slanted edge targets in the frame. When the targets decrease in size, their fuzzy edges decrease in size as well. Therefore, the edges increase in acutance which positively affects the result of the MTF calculation.
Obviously, you want high edge acutance. If the test chart is of bad quality, you cannot resolve the issue in practice, because the distance to the chart is determined by the field of view.
Closing Remarks
Photographing a test chart at various distances and comparing the MTF results is an easy, reliable way to determine the quality of a test chart.
Note that some lenses exhibit varying performance depending on the focusing distance, so if you are unsure, test a given chart with different lenses and compare the results.
Also keep in mind that a high resolution imaging system can only be reliably tested utilizing targets of highest print quality and acutance.
Therefore, I’ve already ordered some replacement charts – this time targets printed on paper. The Forex target will serve as a fancy prop or cutting mat – I haven’t made up my mind yet. Decisions, decisions.

Proprietary RAW Converters
A New Perspective on First Party RAW Editors for Connoisseurs and Professionals
In general, RAW converters provided by camera manufacturers have a bad reputation.
The common belief is that they are clunky to use, slow, lack “professional” features and that the results from them are not on par with third party software.
But is that really true?
Let’s challenge these preconceived notions a bit.
To put the bottom line up front: Most brand-specific RAW converters are actually powerful, professional processing tools and deserve close consideration.
They can give results that are either hard or even impossible to replicate with regular, commercially available software.
This article will explore the main benefits that these converters bring, how they make you rethink your whole photographic workflow and why this will help you to spend less time in front of the editing software and save you a lot of money on top of that.
But let’s go back to the very basics of digital imaging first.
About RAW & JPEG
Professional digital cameras today are able to produce at least two types of image data. A RAW and a JPEG.
RAW files are the most neutral starting point in digital photography, but they are far from being just raw sensor data. Depending on the camera model, more or less processing is applied to the file before it is saved to the memory card.
An in-camera JPEG is created by processing the RAW file according to the camera manufacturer’s specifications, applying user-adjustable settings like color profiles, sharpening, noise reduction and more.
It is this RAW conversion that creates what is often referred to as “Canon colors”, “Fuji look”, “Olympus JPEGs” and so on.
When using a generic RAW-converter, the manufacturer-specific processing is eliminated from the equation – and that is very unfortunate.
The Signature Look
The JPEG engine of each camera manufacturer is much more than just a RAW conversion algorithm.
It encompasses the unique philosophy of each brand when it comes to the almost magical process of creating a digital image.
It is infused with the knowledge of generations of engineers striving to bridge the gap between technical perfection and hard-to-grasp qualities like color rendition and tonal transitions.
Rather than trying to eliminate the camera- and manufacturer-specific look, I’d argue it should be embraced instead. Quite some photographers shoot only JPEGs because of that.
In my opinion, this is not advisable, as valuable data stored in the RAW file is lost, severely limiting the post processing options.
Just imagine in the analog days picking up only the prints from the lab and trashing the negatives – that’s exactly what happens if you shoot JPEG only.
By utilizing the manufacturer’s RAW converter, you get the best of both worlds. The recorded RAW file can be edited exactly as intended by the manufacturer.
This encompasses critical steps like demosaicing, definition of tonal values, color interpretation, sharpening, image noise treatment and the application of lens corrections.
Most importantly, when exposure adjustments are made, the full knowledge of the manufacturer about the whole image creation process comes to bear: The look, the tonal values and the colors are preserved in the best possible way.
Replicating all of these aspects in third-party software is practically impossible.
The RAW Converters
Every camera manufacturer, except Leica, offers a more or less tailor-made RAW converter.
They can be divided in roughly two categories: in-house and SILKYPIX-based software. Fujifilm is the only manufacturer with two RAW-converters – one in each category.
In-House Developed
Here is a list of RAW-converters which were developed by the manufacturers in-house or at least the developer was not made public:
Hasselblad PHOCUS
Phase One Capture One
Canon Digital Photo Professional
Nikon NX Studio
OM System OM Workspace
Sigma Photo Pro
Sony Imaging Edge Desktop
Fujifilm X RAW STUDIO
SILKYPIX – Based
SILKYPIX is a professional, very capable RAW-converter developed by Ichikawa Soft Laboratory in Japan. This is a very important name in the Japanese camera industry, although they fly somewhat under the radar.
Many manufacturers provide adapted, more or less heavily trimmed-down versions of SILKYPIX for developing their specific RAW-files.
The grade of adaption varies. Some of the converters are almost indistinguishable from SILKYPIX, others are completely different in terms of user interface and functions.
Panasonic Silkypix SE
Fujifilm RAW FILE CONVERTER EX
Pentax Digital Camera Utility 5 (heavily adapted)
RAW Converters – A Closer Look
All manufacturer-specific RAW-converters provide the necessary editing parameters to replicate the in-camera JPEG output.
In terms of additional features and overall user experience, the different RAW converters can vary quite a bit. And it is fair to state that they are not all created equal and might take some time getting used to.
Let’s look at two examples to illustrate that.
Nikon - NX Studio
Replaced the SILKYPIX-based Nikon Capture NX and View NX in 2021. Potentially still SILKYPIX-based.
+ Full-featured, professional RAW converter.
+ Area-based white balance picker.
+ 4 Curves L/R/G/B.
+ Fast editing and preview.
o Rudimentary image management (albums).
Verdict: Nikon NX Studio is one of those brand-specific RAW converters that can be used for a professional workflow without any caveats.
The lack of a proper digital asset management has to be taken into account – a very common trait of all proprietary RAW converters except Capture One of course.
OM System – OM Workspace
OM Workspace is the heir of the long-standing line of Olympus proprietary RAW converters.
+ Full-featured, professional RAW converter.
+ Extensive features to “unlock” the JPEG engine.
o Rudimentary image management (collections).
- Relatively slow preview of adjustments (fast GPU needed).
Verdict: Being a proprietary software, OM Workspace is very different compared to common RAW converters. Once you get used to it, Workspace can be used for professional work without any problems, giving you extensive control over one of the best RAW conversion engines ever created.
The Workflow
In order to have a frustration-free experience with brand-specific RAW converters, you have to re-think your photographic workflow.
Instead of doing all editing steps in the RAW converter, which seems to be a very common trend nowadays, you should just focus on the RAW conversion process.
The following steps should always be performed in the proprietary converter:
1) Selection of the proprietary color profile and adjusting all profile-specific settings. This usually includes contrast, saturation and sharpness.
2) Adjustment the exposure.
3) Setting of the white balance.
4) Applying lens corrections.
5) Noise Reduction.
The result of the conversion process should then be passed on to a dedicated photo editor like Affinity Photo.
A 16-bit TIFF is recommended, if additional color grading will be applied. This ensures that all tonal nuances are available for you to work with.
Every time only slight retouching and cropping is needed, an 8-bit JPEG can suffice.
Let me illustrate one additional major benefit:
If you like the results of the brand-specific processing, you can transfer most settings to the in-camera JPEG processing.
This means you can accurately preview the final look on location, even when you shoot only RAW as I recommended earlier.
Those settings are then also stored in the RAW file and are recognized by the brand-specific RAW-file converter.
Then, only minor adjustments are needed in post production.
This can greatly speed up the workflow and allows you to show the client almost-finished results during the shoot.
By refining these presets over time, the output of your camera can be turned into your very own signature look that requires only minimal post processing.
Another great side effect:
This will increase long-term satisfaction and create a unique connection with your equipment, as you will learn to love the specific look that only this camera-RAW converter combination will produce.
A word of warning: Marketing departments trying to sell you new cameras won’t like that, believe me.
Conclusion
If you research old digital camera reviews from the early 2000s, you will notice that the quality of the JPEG output was always a very important aspect.
With the rise of third party RAW converters and powerful computers, the importance of color science was more and more neglected. In the reviews, metrics like megapixel, ISO performance and auto focus points took over.
This development led, however, to a growing overhead in terms of RAW development. An ever growing number of functions and options in third party software did, in my opinion, only accomplished two things:
It added superfluous post processing steps and it gave us the wrong idea that everything can be done with the RAW file, regardless of camera sensor, image processing pipeline and shooting circumstances.
By utilizing the camera manufacturer’s RAW converter, you can take back control and start focusing on photography itself.
Much like when working with film, the importance of capturing the scene properly will become more obvious and this will make the resulting images drastically better.
On top of that, the various picture styles are like an extensive, free library of actually useful presets.
Those are not glorified slider adjustments conjured up by some random person on the internet, but sophisticated processing algorithms designed by generations of engineers and scientists working for your specific camera brand.
And the best part is – all of this is free of charge and if done correctly, a huge time saver.

Comparing Sensor Formats
Comparing differently sized recording media sounds simple in theory, but is very difficult in practice. This article aims to summarize essential concepts and highlight some pitfalls and misconceptions when it comes to equivalence and comparing sensor formats in photography.
Focal Length and Angle of View
Focal length is a measure for how an optical system focuses light.
Angle of view – sometimes also referred to as field of view – describes the angle range that a lens can image.
The angle of view a lens produces is the result of the relation between film/sensor size and the focal length of the lens.
Focal length alone is not indicative of the angle of view that will be recorded.
The focal length of a lens does not change with the size of the recording medium.
Strictly speaking, there is no “equivalent focal length” in photography, but only equivalent angle of view.
Aperture and F-Stops
The term aperture is used to describe an opening of an optical system.
In photography, aperture is indicated in f-numbers, also called f-stops, which take the ratio of focal length to effective aperture diameter of a lens into account.
As a result, the light gathering capabilities of lenses regardless of their focal length can be compared by examining their f-stops.
Every lens with the same f-number collects the same amount of light per surface unit.
Strictly speaking, there is no “equivalent f-stop” in photography.
Plane of Critical Focus & Depth of Field
The plane of critical focus is parallel to the film/sensor plane.
Depth of field describes the distance between the nearest and furthest points in a photograph that are still in acceptably sharp focus. Depth of field is therefore an almost arbitrary concept.
Depth of field varies depending on the aperture, subject distance and enlargement of the recorded image. The focal length is practically negligible.
1) The larger the aperture, the less depth of field and vice versa.
2) The shorter the focusing distance, the less depth of field and vice versa.
3) The higher the magnification of the recorded image, the less depth of field and vice versa.
Entrance pupils compared.
Light Gathering
A larger surface is able to gather more light in total than a smaller surface.
It is a wrong assumption that a lens with the same f-number collects more light per surface unit on a larger sensor than on a smaller sensor and vice versa.
Additionally, the sensitivity to light per each surface unit does not change with the total size of the recording medium.
In other words:
A lens with an f-number of 1.4 collects the exact same amount of light per surface unit regardless of the total recording medium size.
Photographic film with ISO 400 is as sensitive to light in a large format camera as it is in a small format camera. If this would not be the case, a photographer would have to set different exposure parameters depending on the film size – which is obviously not the case.
Sensor Size & Image Quality
General Statement
Under the same circumstances, larger camera system will provide better image quality than a smaller camera system.
Size : Image Quality = not linear
The image quality does not increase linearly with sensor- and/or lens size. In reality, a camera system double the size does not provide double the image quality.
This includes parameters like resolution, noise performance, dynamic range and more.
Third - With increased size, the relative and absolute improvements diminish.
Display Media – The “Big Equalizer”
As display media drastically limits the reproducible image quality, the output of a smaller camera system and a larger camera system are in most cases factually indistinguishable.
(Click on the images below to download them)


Remark #1
Depth of field is not related to focal length.
A lens with the same focal length produces a different field of view when used with differently sized recording media.
A smaller recording medium requires a shorter focal length than a larger recording medium and vice versa to get the same field of view.
Comparing two lenses with the same f-number and different focal lengths, the lens with the shorter focal length has a smaller entrance pupil.
This is the reason why a small format camera with a shorter focal length produces more depth of field than a large format camera with a longer focal length at the same angle of view and at the same focusing distance.
Remark #2
On average, a recording medium with a larger surface can record more detail and exhibits less grain/noise than a smaller recording medium.
In digital photography, this is mostly because it is easier to design a bigger image sensor with favorable qualities.
In film photography, this is mostly because grain is enlarged less when the overall surface area of the film is bigger. Therefore, less grain is visible in the final image, leading to higher image quality.
In general, it is easier to design and produce lenses for larger film/sensors.
In theory, if the absolute best technology is used to design a large photographic system and the same technology is also used for a small photographic system, the larger one would outperform the smaller one in terms of image quality.
In practice, the different design choices that have to be made and technological differences mean that a bigger system is not necessarily “better” than a smaller system.
Conclusion
It is impossible to “create” perfect equivalence for the sake of comparing different camera systems.
Most contemporary camera systems provide sufficient image quality for all practical purposes.
The usability of a camera system therefore depends on its size, weight, agility, reliability and flexibility, rather than on image quality.

Small Sensor – Low Light
Shedding Light on Some Common Misconceptions
In low light situations, a bigger sensor has an advantage over a smaller sensor. But how significant is the difference in practice and does it really prevent you from getting the shot you want?
The Problem With Low Light
Low light situations are only challenging when you need fast shutter speeds. If the photographic situation allows you to use slow shutter speeds, you can virtually use the lowest ISO setting of your camera every time and still get the shot. Just use a tripod or rely on in-camera or in in-lens stabilization.
Of course, if the exposure times are very long, you might want to perform a dark frame subtraction either in camera if you have a model that is capable of doing that or in post production.
This means that we have to look at scenarios where freezing the motion is required to get the shot. Then have to overcome two challenges that we don’t have to deal with when photographing still subjects:
1) Our cameras have to focus on a moving subject.
2) High ISO settings are needed to get fast enough shutter speeds to prevent motion blur.
Autofocus in Low Light
Low light requires wide apertures, and this puts autofocus systems to the ultimate test.
Having more depth of field with a MicroFourThirds camera is actually beneficial. An MFT camera therefore has more wiggle room to work with. This is an advantage that can lead to higher hit rates.
Another slight advantage of a smaller sensor when it comes to focusing has to do with optics. Lens elements of a smaller system that have to be moved around by focusing motors are significantly lighter.
The difference can be quite obvious when shooting with medium format.
All in all, I am not suggesting that small sensor cameras have a major advantage when it comes to focusing, but it is safe to state that they are at least on par with their bigger counterparts.
High ISO - Image Noise
The problem with high ISO numbers is the resulting noise.
While luminance noise is usually acceptable, color noise rarely is.
Usually, when color noise takes over, converting the file to monochrome is the only solution to the problem.
In general, new cameras control color noise very well and using proprietary RAW converters can also really improve the noise performance, as those are tailor made by the camera manufacturer for their respective products.
It is also quite interesting examining where noise is most visible:
Dark areas are noisy areas - this problem can be somewhat mitigated by setting the black point.
Apart from that, noise is also more discernible in out of focus areas. The wider depth of field that you get from a smaller sensor camera is therefore actually a small bonus.
Low Light – Why and When Small Sensors Fail
If you over- or underexpose images under extreme lighting circumstances, this is usually when the problems begin.
When shooting with high ISO numbers, the overall dynamic range and the high fidelity dynamic range any digital camera can record will decrease at some point.
The relationship between ISO and dynamic range is not linear, at least not up to a certain point, but it exists.
When I was shooting with larger sensor cameras, the benefit of one or two stops more dynamic range just gave me more room for messing up and fixing it in post production.
This is the main reason why on average, large sensor cameras feel easier to work with in low light.

Lumix LX100
Conclusion
I am very confident to state that smaller sensor cameras are more than good enough to get the job done
What really ruins low light shots when working with small sensor cameras is not getting the exposure right, for example by being too conservative with the ISO setting.
Thanks to this revelation, I’ve developed a more attentive attitude towards exposure metering under all lighting circumstances regardless of which camera system I am working with.

Sensors: The Reality of Dynamic Range
Should you really buy a large sensor digital camera because it has more dynamic range?
Let’s find out!
Reality Check
Today, it is time to address a statement we hear all the time: “Small sensors are fine, but their dynamic range is so limited. You just need a bigger sensor for sufficient dynamic range.”
But is that really true? Time for a reality check!
To answer this question, we have to consider two aspects:
1. How much more dynamic range does a bigger sensor provide?
2. Is the advantage significant enough to impact our photographic practice?
Sensors Compared
Probably the best independent source for the photographic dynamic range of digital cameras is photonstophotos.
Let’s compare what different models are able to capture at their respective optimal ISO settings – get ready to have your mind blown:
Nikon D2H – 7.01 Stops
Canon EOS 5D Mark I – 8.34 stops
Olympus OM-D M5 – 9.27 Stops
OM System OM-1 – 9.54 Stops
Canon EOS 5D Mark IV – 10.83 Stops
Sony A9II – 10.9 Stops
Nikon D800 – 11.42 Stops
Pentax K-1II – 11.6 Stops
OM System OM-1; Live ND64 – 12.01 Stops
Fuji GFX 100 – 12.3 Stops
Phase One IQ4 150 MP – 13.33 Stops
Not counting the worst of the bunch, the Nikon D2H, which I just threw in there because I really like it, the differences are not huge at all!

Nikon D2H
The “Grandad”-category cameras 5D and D2H capture 7 to 8 stops.
MicroFourThirds, the most compact professional camera system on the market, delivers around 9 stops.

Olympus OM-D E-M5 I
With a 35mm equivalent cameras, you get about 11 stops.
In digital medium format, only the high-end Phase One backs give you anything above 13 stops. That is as good as it gets right now, for only 42.000 Euros without camera and lenses.
In Practice
An evenly lit subject requires 4 stops of dynamic range, even the Nikon D2H can handle that easily.
The most extreme lighting ratio I’ve ever encountered on set was 32:1. To capture the full tonal in such a situation, 9 stops are needed. The OM-D M5 is good enough for that. Granted, it is a really good camera, although an eleven year old one.

Canon 5D Mark I
The HDR Challenge
Mostly in landscape and architecture photography, subjects can require more than 9 stops.
So if you run out of dynamic range, you have bracket and combine the images in post using either tone mapping or exposure blending.
Here are some considerations:
1) Of course, there should be little to no subject movement. Is that a problem? Not really, as buildings and mountains very rarely move a lot.
2) In order to get a high quality HDR image, the dynamic range of the individual shots have to have some overlap. With new cameras, a step size of 2-3 stops works fine, but with old digital cameras, the bracketing steps have to be around 1 stop. This can be a bit tedious, but it is definitely doable.
Having said that: with the Nikon D2H – which was really never meant to be a high dynamic range camera – a 9 frames bracketing burst will give you 15 stops of dynamic range. Take that, Phase One with your measly 13 stops!
High ISO
What about low light photography? Isn’t it true that you loose dynamic range when raising the ISO.
Yes, that is true, but when do you shoot high ISO? When you want to freeze motion. This is usually in reportage or some kind of action photography. Very rarely you need more than a few stops to capture the full tonal scale of your main subject in these situations.
With a camera that has less than 7 stops of photographic dynamic range, this can be a bit annoying and you might want to bring a flash. Everything above that: You are fine.

Nikon D800
Conclusion
Larger sensors deliver better image quality. It is debatable whether this image quality is really necessary. Be that as it may, if we just look at the dynamic range, we have to ask ourselves the question:
Does the Difference Make a Difference?
Under normal circumstances, eight stops are plenty.
If you are dealing with an HDR scenario and you want to capture it, you have to either shoot multiple exposures or use something like a graduated ND filter. And that is just the reality of it.
The difference between a 40.000 Euro Phase One digital back and a 100 Euro Nikon D2H from 2003 is around eight shutter actuations. And the Nikon D2H has a very durable shutter unit, so don’t worry about that. I would worry more about having 146 MP less.
Fun calculations aside, you should definitely not buy a stills camera because it has one or two stops of dynamic range more than the other one. This just does not make any sense.

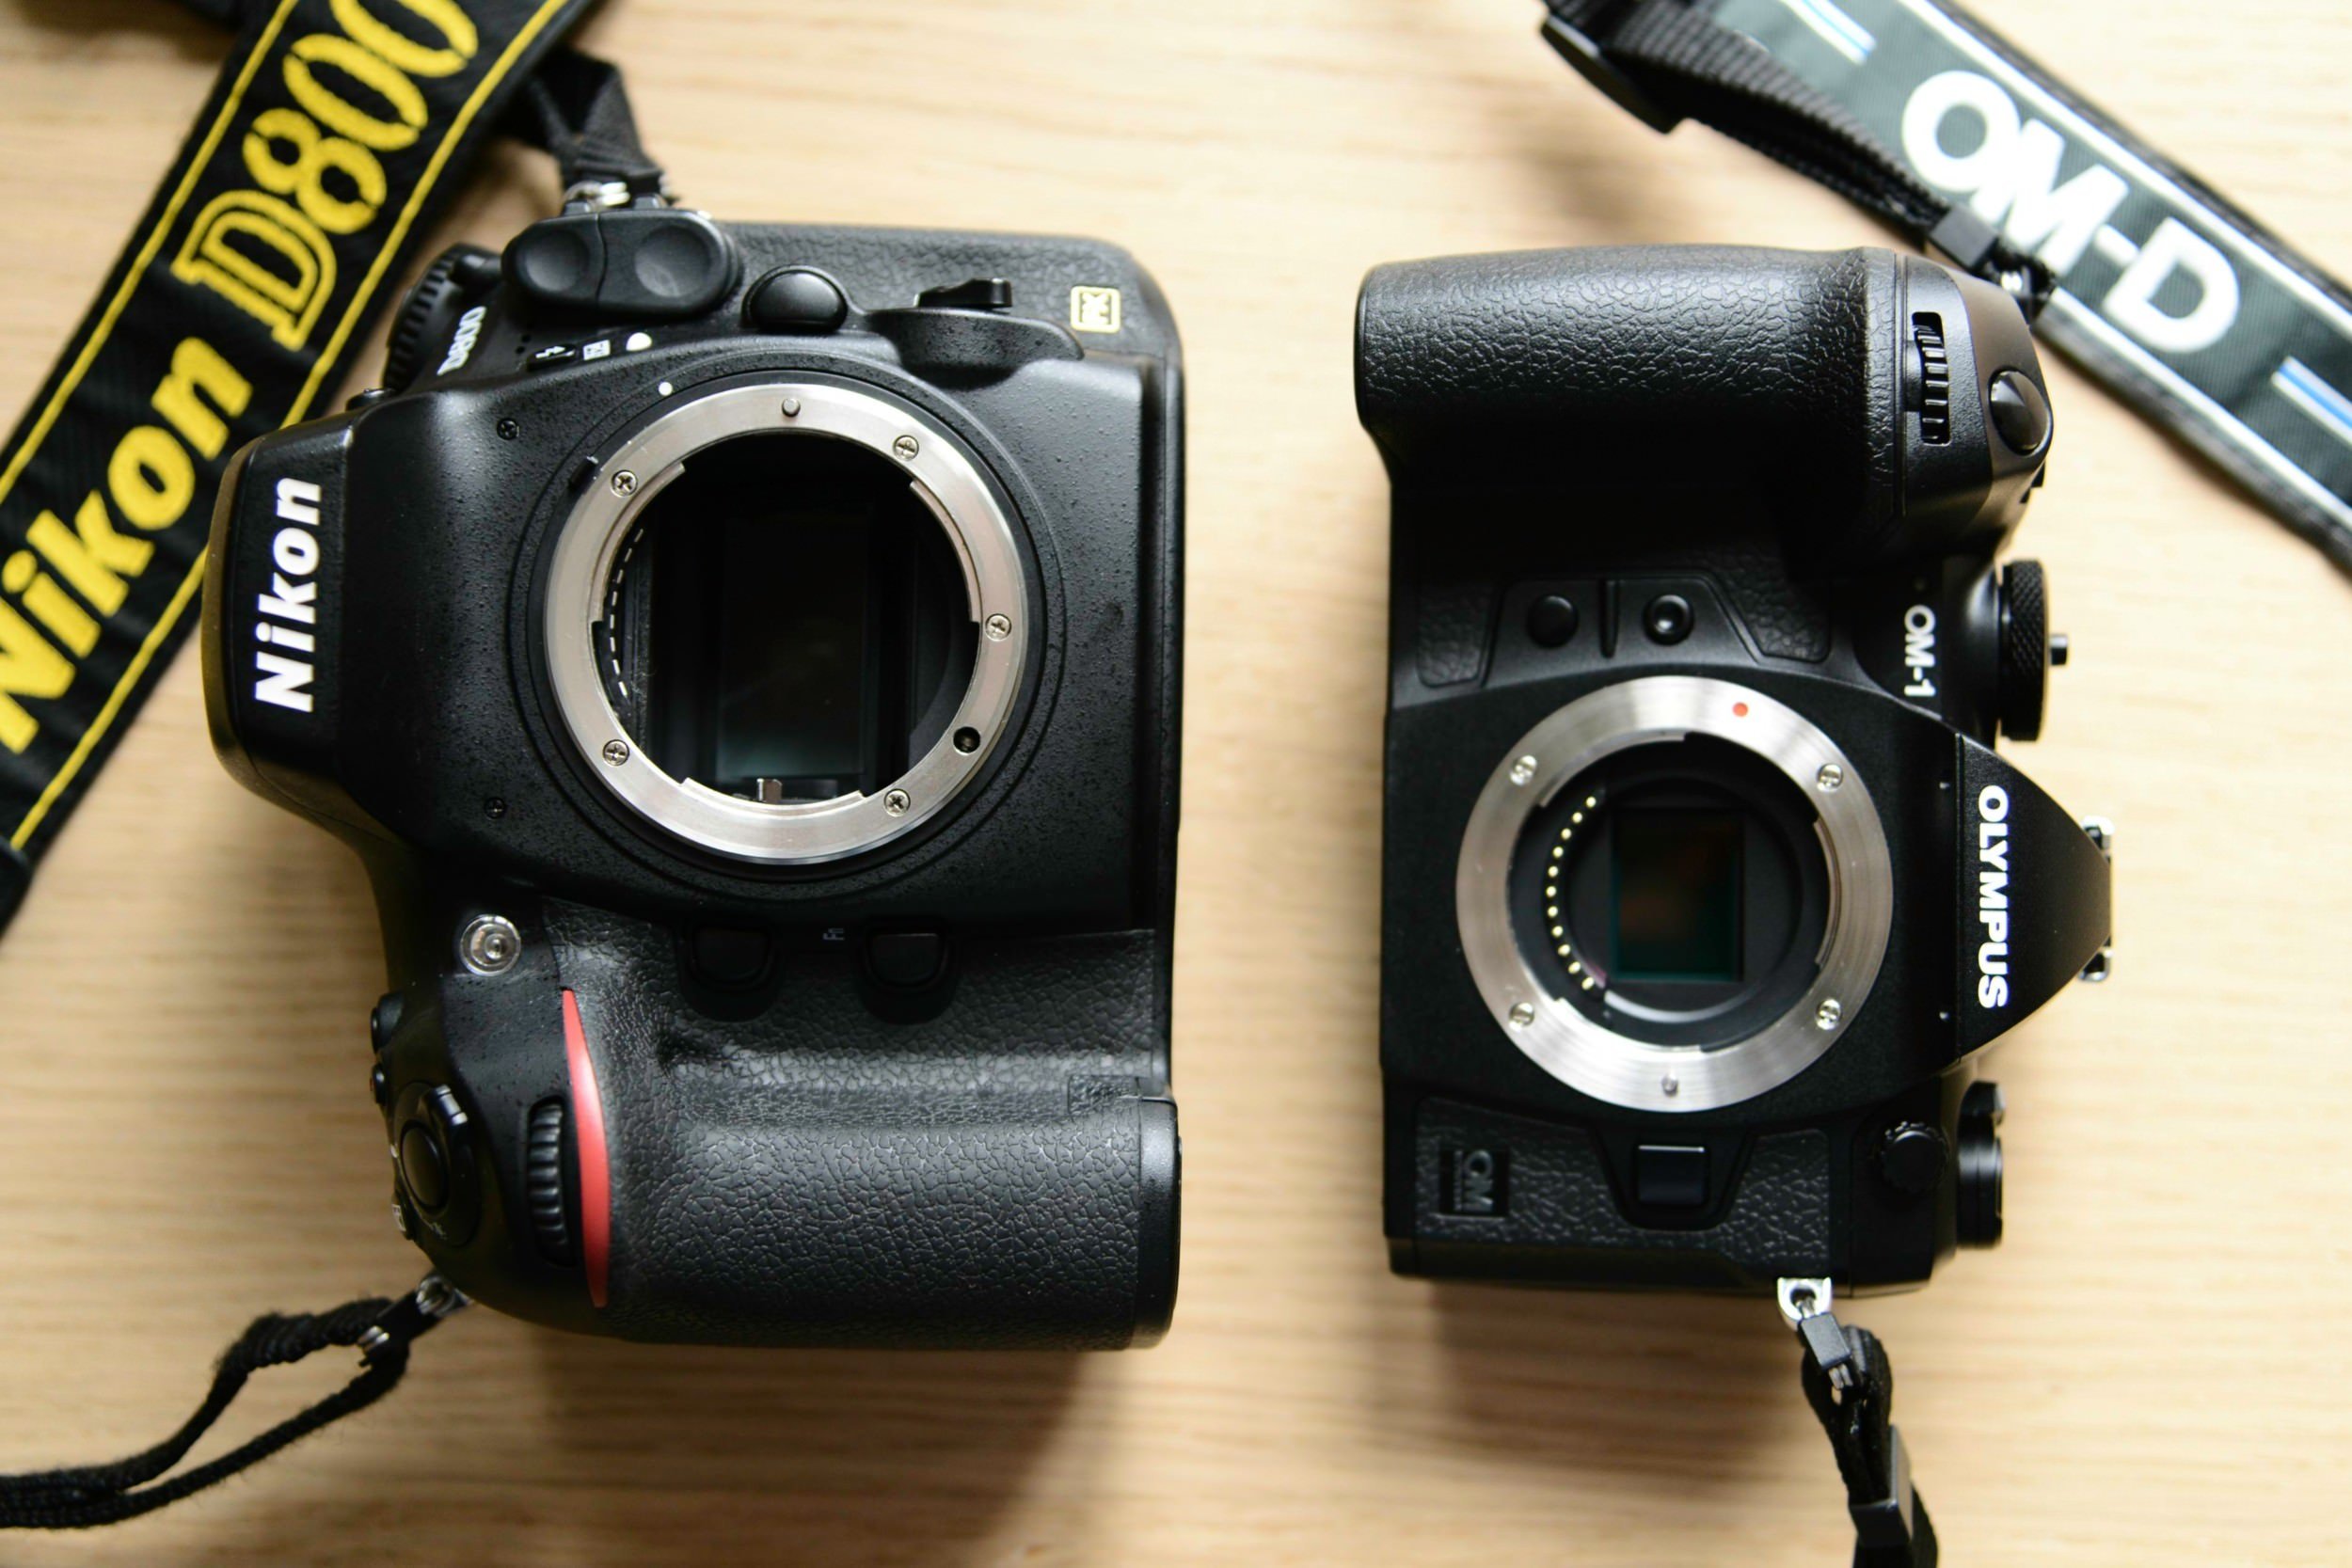
Nikon DSLR Setup Compared to Equivalent OM System MFT Setup
Size, Weight, Price and Capabilities
Over the years, I’ve carefully adjusted my Nikon DSLR setup to fit my needs. Now that I got an OM System Setup in addition, it was only natural to get all the equivalent equipment in MicroFourThirds as well.
In this article I’ll compare the two kits in terms of capabilities, size, weight and price.
Comparison
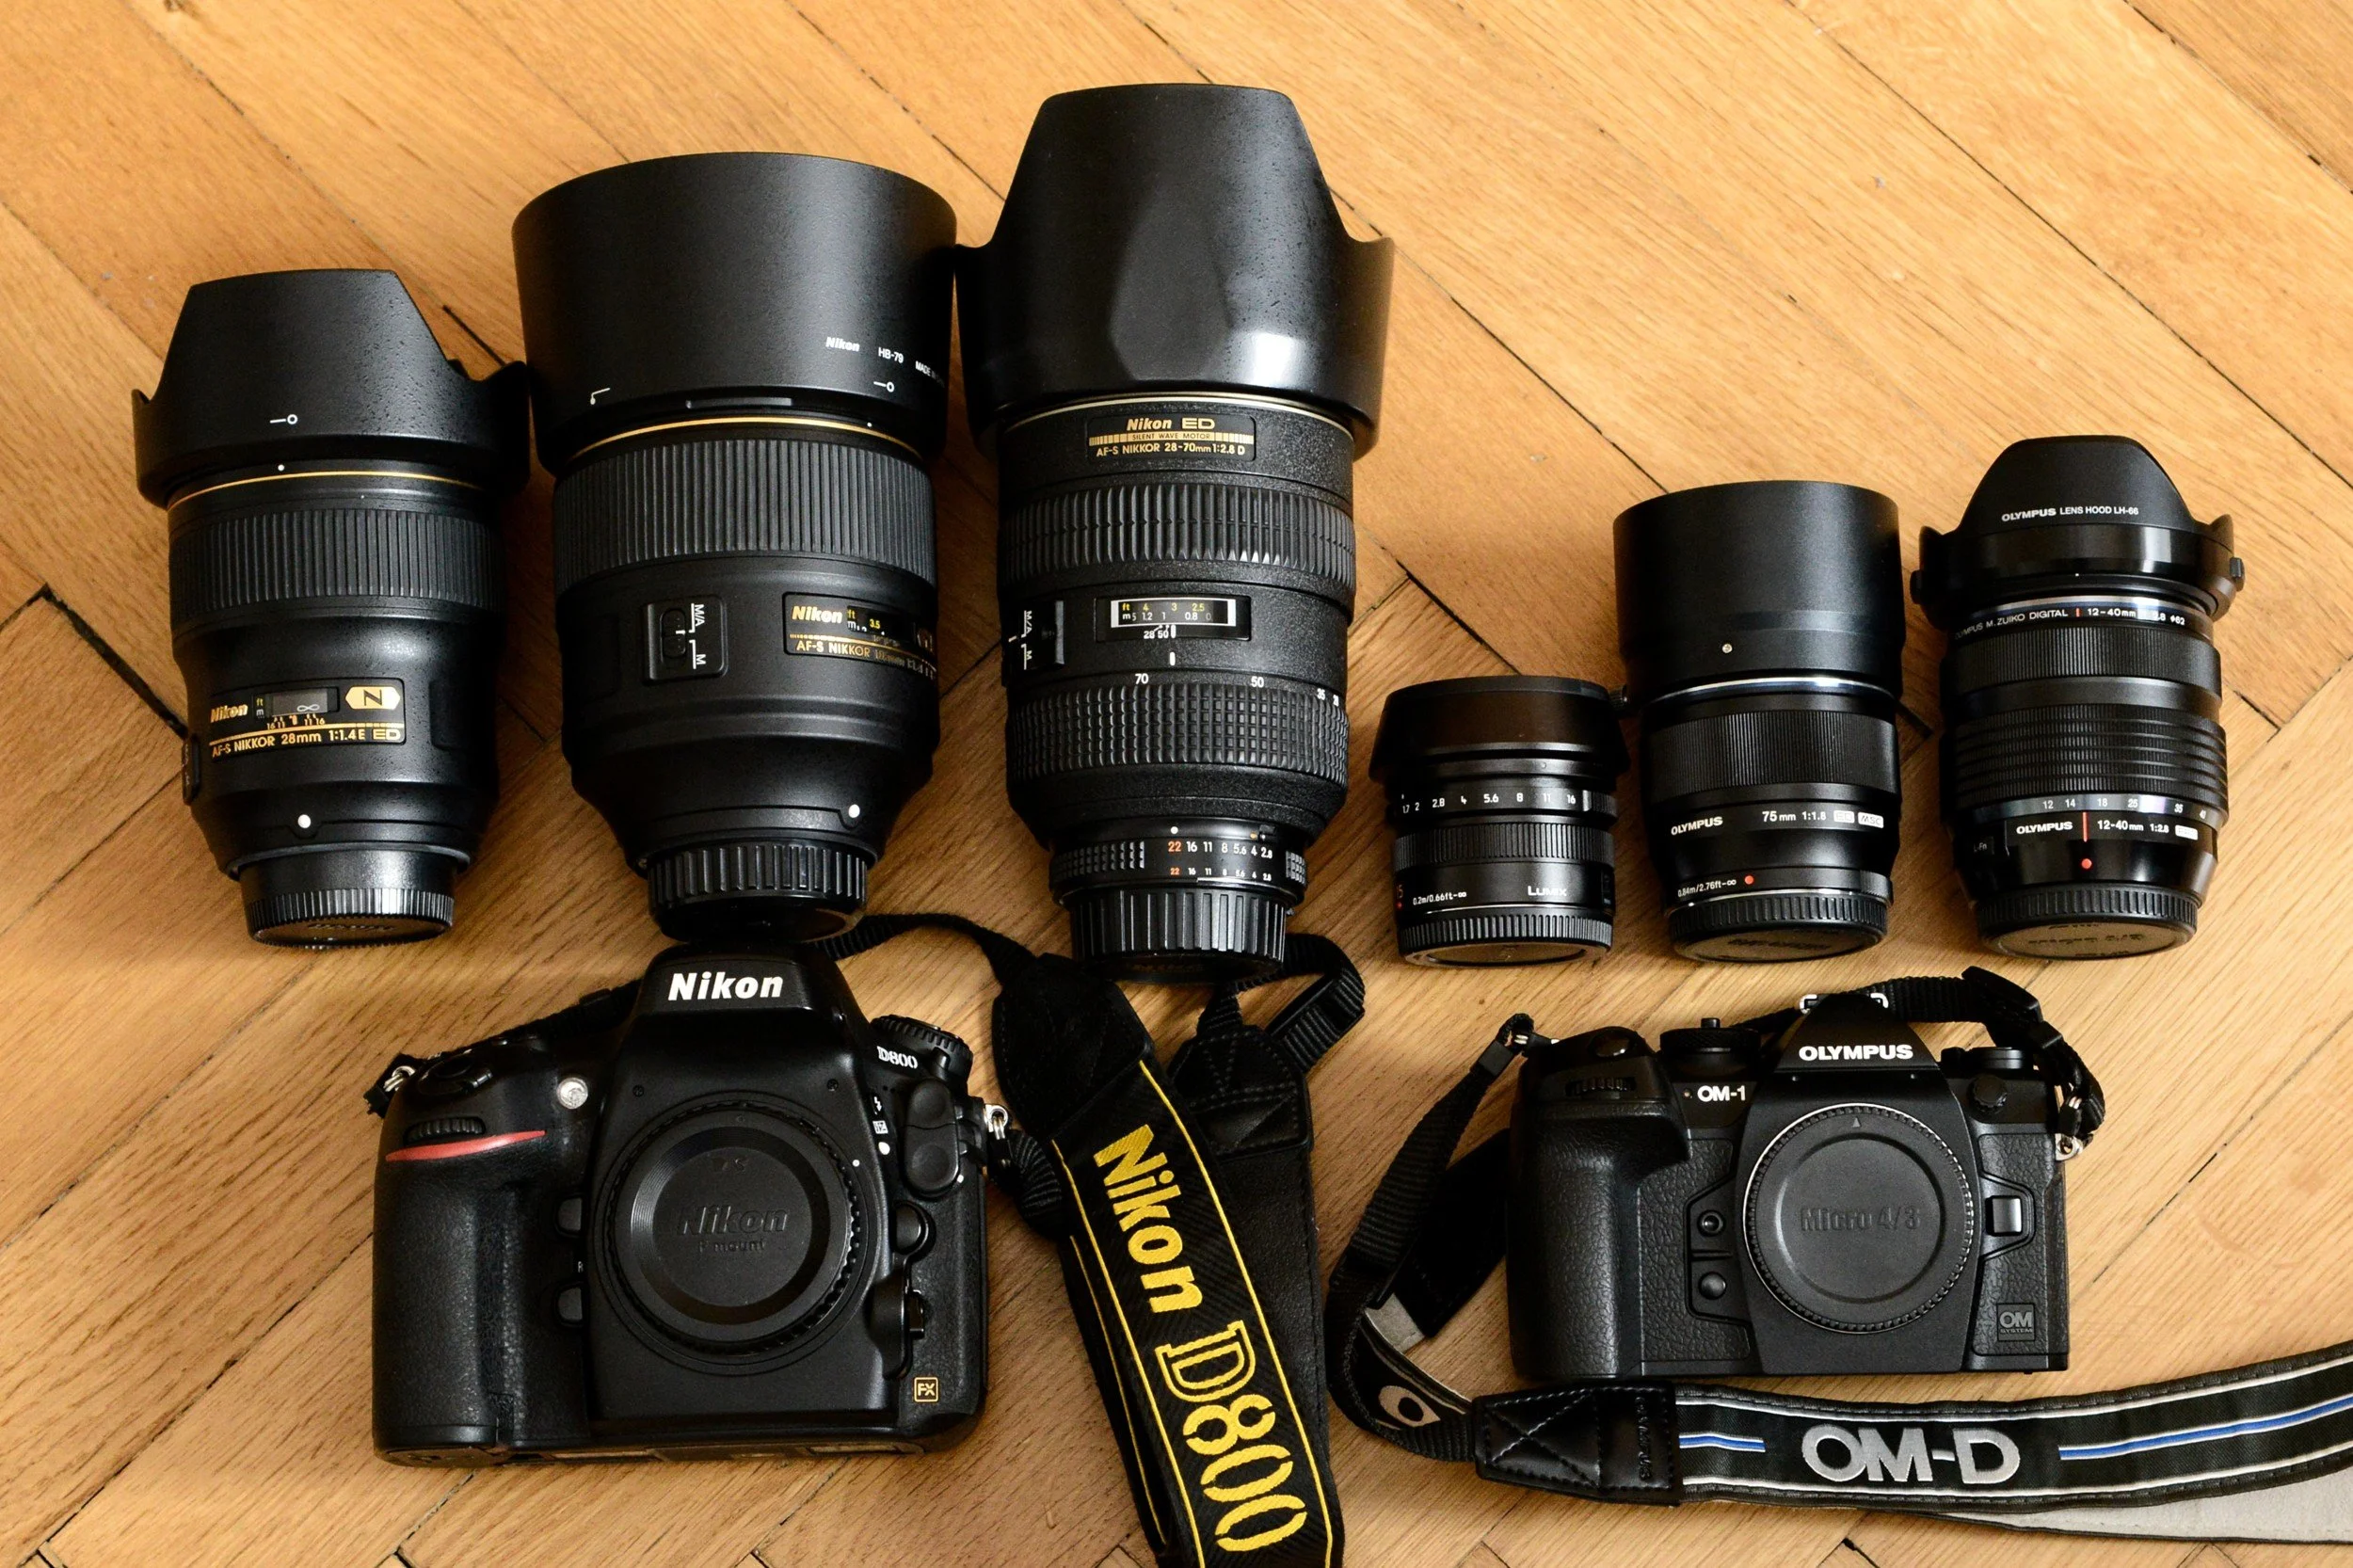
Each of my basic kits consist of two camera bodies, a fast wide-angle, a fast telephoto prime as well as a mid-range f/2.8 zoom. Depending on the type of job, I add an ultra-wide angle prime (around 20mm FF) and a macro lens (around 60mm FF). For the sake of this comparison, I am only considering the basic kit.
Camera bodies: 2x Nikon D800 // 2x OM System OM-1
Fast Wide-Angle: Nikkor 28mm f/1.4E // DG Summilux 15mm f/1.7
Fast Telephoto: Nikkor 105mm f/1.4E // M.Zuiko 75mm f/1.8
Mid-range zoom: Nikkor 28-70mm f/2.8D // M.Zuiko 12-40mm f/2.8 PRO
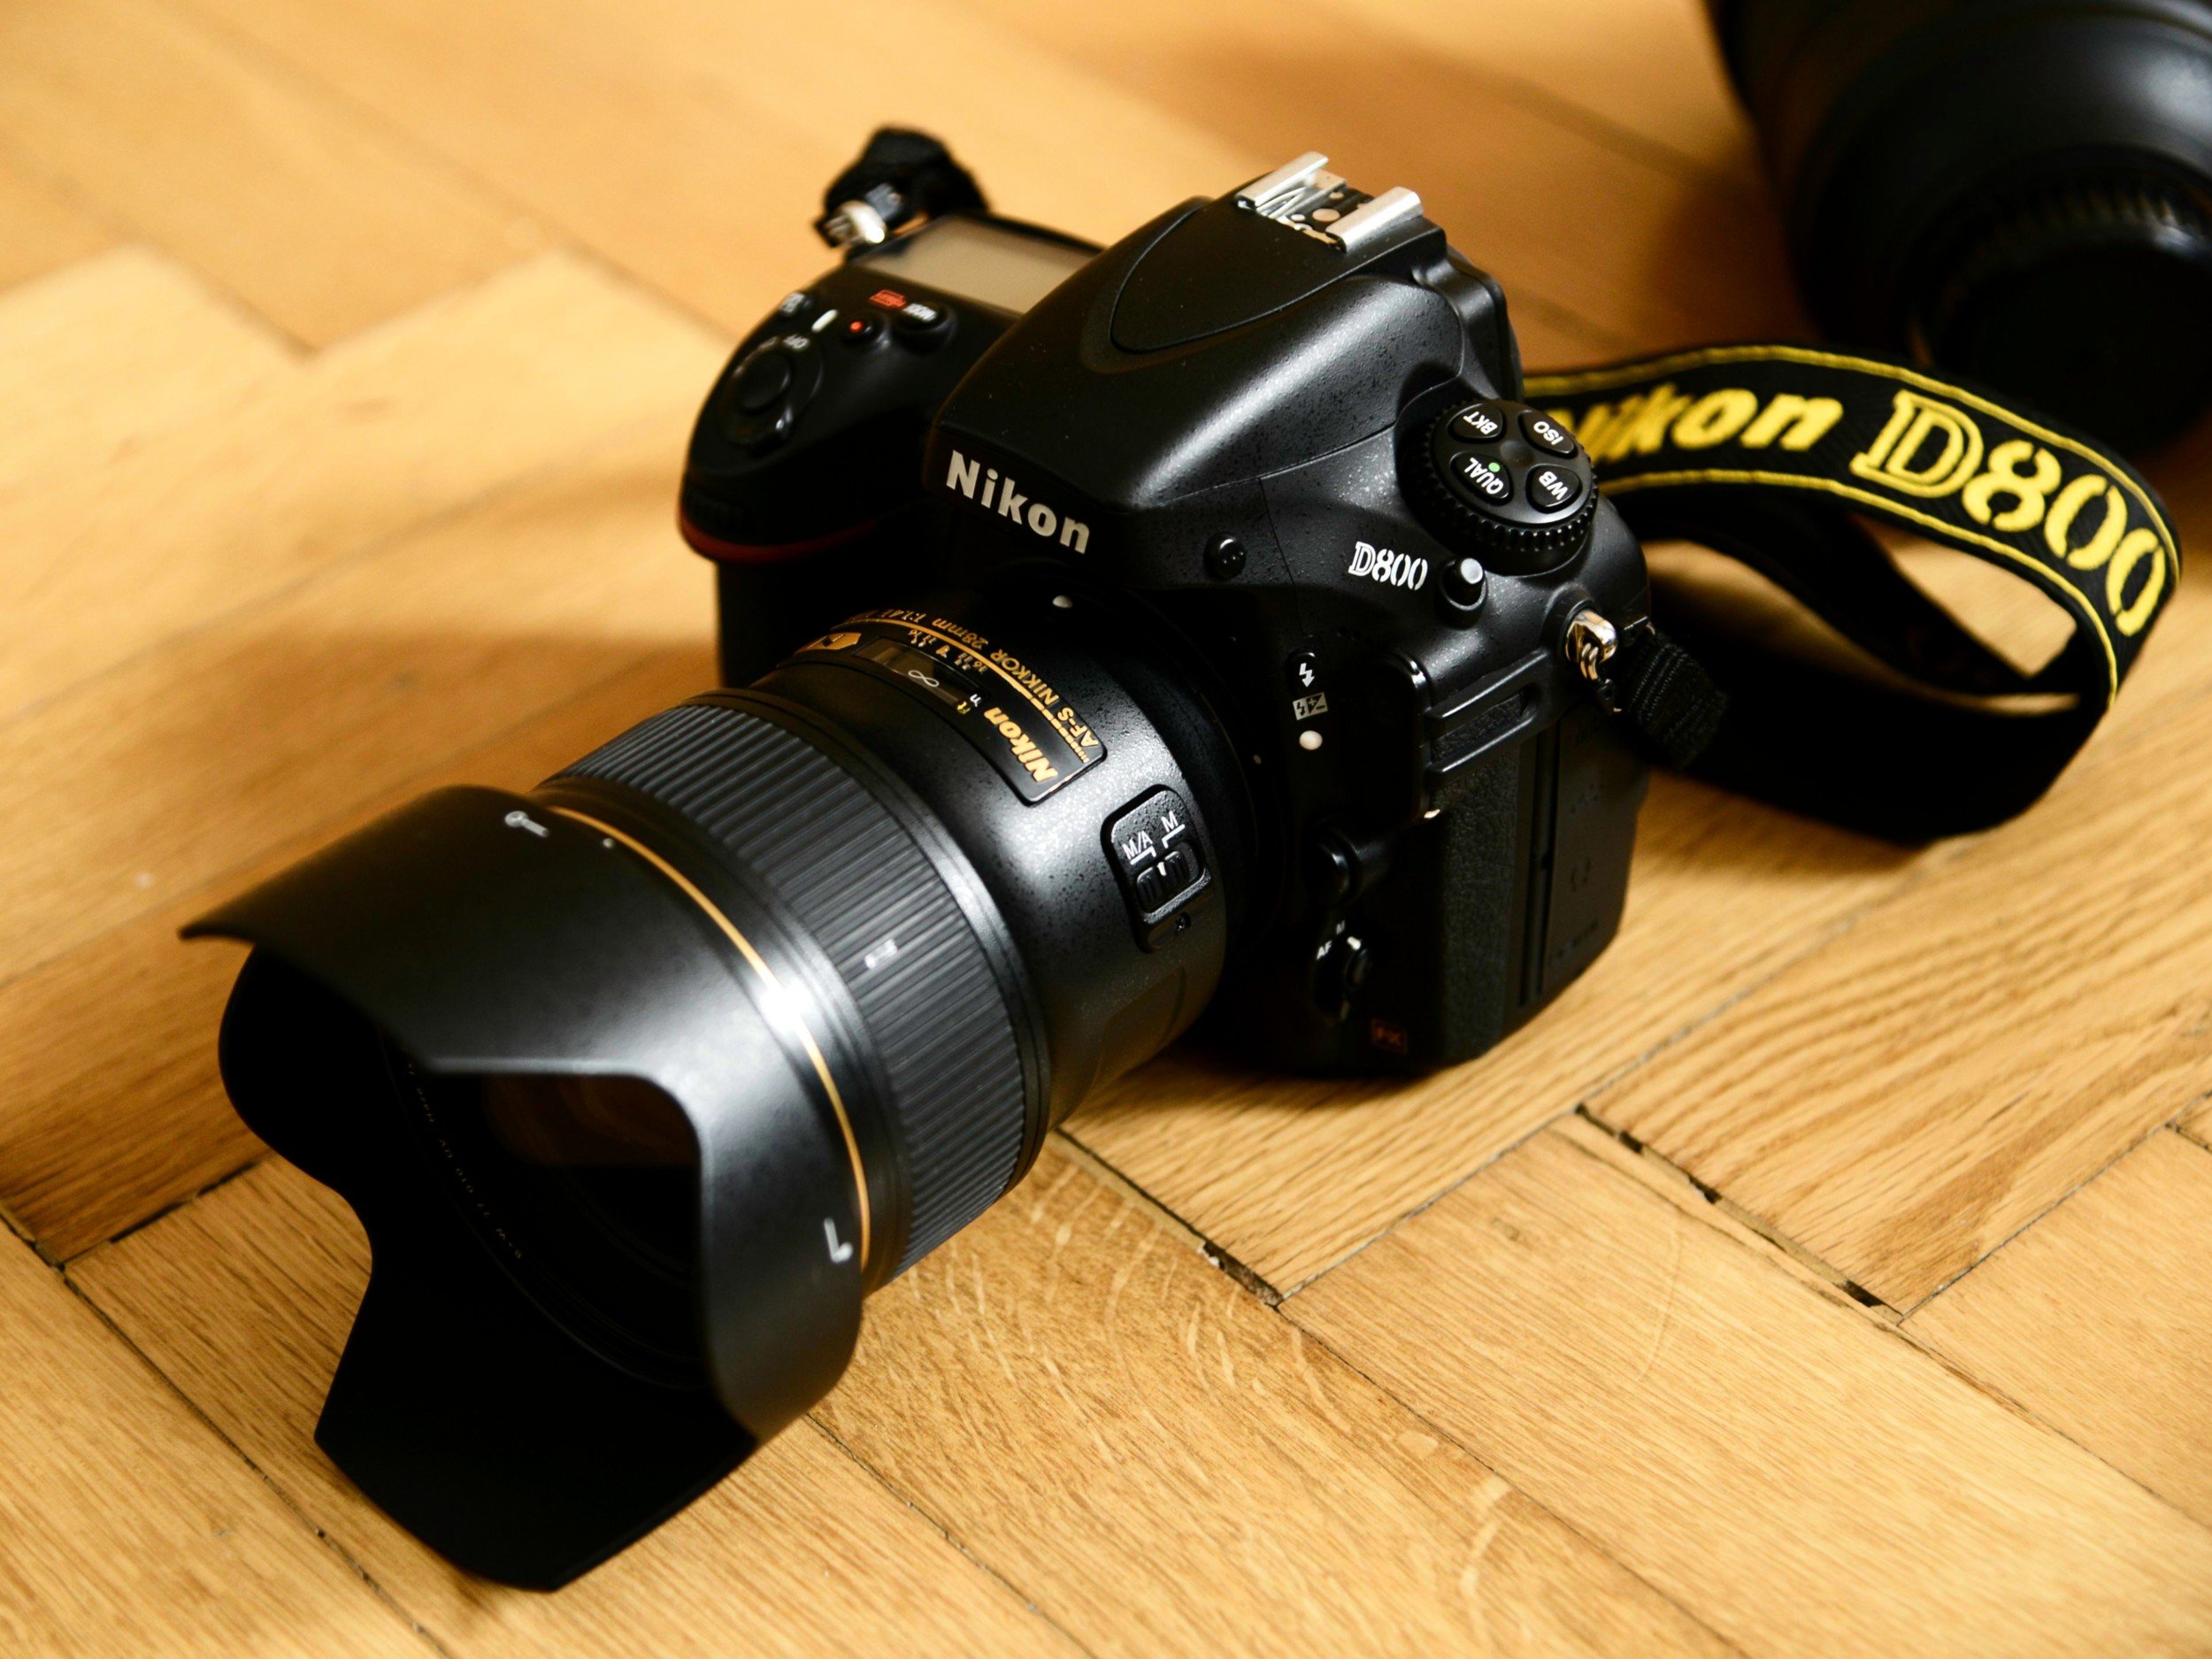
Outstanding duo - the D800 with the AF-S Nikkor 28mm f/1.4E
Capabilities
Resolution
In terms of raw, technical one-shot resolution, the D800 kit outperforms the OM-1 kit.
The OM-1 does offer a well-implemented handheld high resolution shot mode, that drastically improves the image detail and is – in good light – also usable for portrait subjects.
Low-Light
In low-light scenarios, the Nikon kit has some advantages: The Nikkors have a slightly larger aperture (f/1.4 vs. f/1.7-1.8) and the predominantly ISO-invariant D800 sensor retains detail better when shooting higher ISO.
However, the OM-1’s imaging pipeline and ability to shoot all lenses wide open while still generating enough depth of field help the MFT-system to come closer than expected. Getting the job done in ISO 12.800 scenarios is doable with the OM-1.
Rendering
An interesting feature of a larger sensor is that you can get lots of different “looks” out of it.
By stopping a fast lens down, the depth of field increases to give you a look similar to what an MFT camera produces, but you still have the option of shooting wide open for a different effect.
On a side note: The F-mount lenses in my bag perform very good when shot wide open, but as a rule of thumb, FF lenses love being stopped down while MFT lenses love being shot wide open. Depending on your needs, this might impact the range of usable apertures.
Again, I would not name the D800 as the clear winner right away, as it comes down to preference and use cases.
I myself prefer the wide-angle wide-open look I get from the Nikon kit compared to the OM-1 wide-angle wide-open look. For telephoto shots, it is the other way round, as actually prefer the MFT look.
Image Files & Subjective Image Quality
The D800 feels much more analog, and the captured files seem to reflect that as they are less of a finished image and more like a negative that can be taken in many different directions. The amount of manipulation the D800 files tolerate is incredible.
Image processing was always one of the strong points of Olympus / OM System. Files out of an OM System camera are most of the times perfect without further editing and can be delivered to the client or posted on social media right away. In order to get this magic look, you have to stick to in-camera editing or the proprietary image editing software, OM Workspace.
It is fair to conclude that the revolutionary combination of sensor, ADC and image processing give the OM-1 some tricks to play catch up and achieve impressive subjective image quality.
Auto-Focus
Both the Nikon and the OM have very reliable AF systems – if you mess up with either of these cameras, it is usually your own fault.
Nonetheless, in terms of convenience and versatility, I’d give the OM-1 AF the edge. It is a very impressive camera in that regard.
Being able to compose outside the boundaries of a fixed AF-area gives me more freedom in regards of composition while also reducing the need for post-production cropping quite a bit.

OM-1 - Subject detection AF
Video and Versatility
The D800 is a classic photographic tool, which is impressive in and of itself. It is also quite good as a classic video camera – meaning focusing manually and filming from a stabilized platform.
The OM-1 is very different. It is the most feature packed camera I’ve ever used, and none of the features it has are gimmicky.
Image stabilization, reliable video AF and overall better video output make it a powerful video tool.
Various computational photography modes – some of them found only in OM System cameras – extend its capabilities and work seamlessly thanks to the powerful processor.
Size And Weight
It will come to no surprise, that the OM System kit is far lighter and more compact than the Nikon DSLR kit. But how much lighter is it?

D800 + 28mm f/1.4E = 1.7kg
All in all, the Nikon kit weighs approximately 5kg while the OM kit is only 2.3kg. That is a significant difference and it can be felt when working with the kit.
In the past, when shooting fashion shows, I always brought my stuff back to the studio before attending the after show parties. Last time with my MFT kit, I just went straight backstage. I did not even bring my studio trolley to haul my equipment to the location. My normal Domke F-2 provided enough capacity.

The Domke F-2 can carry my whole setup - without breaking my back. For the Nikon set, I prefer the Manfrotto TOUGH 55 Trolley.
Price
The Nikon kit can be purchased on the second-hand market and all in all, it would cost around 4.000 € right now.
If purchasing everything on the second hand market as well, the MicroFourThirds kit costs 5.800 € at the moment.
This is no surprise to me, and underlines what I’ve said previously – in terms of bang for the buck nothing comes close to a DSLR-setup, even if you add pricey, high-end lenses like the 105E and 28E.
To be fair, if you would settle for older MFT bodies like the E-M1II, the MFT-kit would be significantly cheaper, but also less capable.
Conclusion
After a few months of alternating between the D800 and OM-1, I can already say one thing – a full MFT kit is convenient to handle, very nimble and flexible.
The D800 kit on the other hand gives me a lot of camera – something I also appreciate. The FX D800 is a no-excuses stills machine capable of producing very detailed and sharp images when paired with one of the three Nikkors I previously mentioned.
Studio photography and jobs where I don’t have to carry the camera around my neck all day long are natural habitats for the D800.
Jobs that require travel by train or plane as well as long reportage-style shoots are more comfortable with the OM-1 kit.
The fascinating realization I had is that both kits are good enough for all photographic applications, making it a matter of personal preference and convenience.


Why I Got an OM System OM-1

The Merits of MicroFourThirds
I’m a huge advocate of Nikon DSLRs – nonetheless, I got back into MicroFourThirds by purchasing an OM System OM-1 recently.
Let’s explore the merits of MicroFourThirds.
Size and Weight
A previous blog article of mine was about why 2022 is the best year to pick up a DSLR for professional work. My argument was, that getting a FF mirrorless instead of a FF DSLR does not make much sense, as it costs a lot more and system weight and size do not change significantly. However, I’ve also mentioned that if one really wants to go mirrorless to get a size and weight advantage, MFT is the only real option.
I know that very well, as I’ve started my professional career with the Olympus OM-D M5 Classic and the M.Zuiko 12-40mm f/2.8 PRO.
The idea of having a smaller, yet high-end system was very intriguing to me, and probably the biggest reason why I got the OM-1.

This is how my career started - the Olympus OM-D M5 Classic with the M.Zuiko 12-40 f/2.8 PRO.
User Experience Versus Convenience
If I want to feel like a real photographer, then I have to grab my Nikon D800. The user experience a high-end DSLR offers is unmatched. There is no mirrorless camera that can give me the same shooting experience. A DSLR is as unique as a Leica M rangefinder.
The OM-1, on the other hand, is an incredibly convenient camera. Face detection, full frame AF coverage, in-body stabilization, a sharp electronic viewfinder and a touch screen make it a very manageable imaging tool.
Other small bonuses the OM-1 brings to the table are that the lenses need no AF calibration and that the 20MP files use up less disk space while still offering enough resolution.
The resolution was a huge argument for getting an OM-1. Everything above 24MP takes up so much disk space and therefore costs a lot of money and computing performance in the long run.
Connectivity
Connectivity is a very important trait of the OM-1.
Transferring one or two files to the smartphone for a quick story on Social Media or for the client to take home is a necessity and often expected by the customer.
The OM System Wi-Fi app is very stable, fast and – again – convenient to use.
Also, in terms of tethered shooting, the OM-1 gives me an impressive degree of control over the camera. Especially for reproduction photography, this makes a lot of sense.

OM-1 - connectivity is trump.
Performance and Versatility
I don’t think that DSLM cameras outperform DSLRs in any meaningful way. Both camera types are so different that it does not really make sense to compare a DSLR to a mirrorless camera. It is like comparing a Leica rangefinder to a DSLR.
I expect a camera being able to keep up with my workflow – and I’m regularly pushing the limits of my equipment. So far, the OM-1 did keep up and added a lot of convenience in the video department.
The OM-1 also doubles as my YouTube camera, a role the D800 cannot fill.

OM-1 - Mode Dial
Final Thoughts
Owning a Nikon D800 and an OM System OM-1 currently gives me the best of both worlds.
The unique user experience of a 35mm DSLR, native access to one of the finest mounts in camera history – the Nikon F-bayonet - and the remarkable 36MP sensor of the D800 are nothing I want to give up anytime soon.
The MFT OM-1, on the other hand, combines convenience, performance and unique capabilities – in one compact body.
I love to have both options at my disposal.

Glowy Fashion Look
The Visual Concept

A soft-focus, glowy look can lend fashion photographs an ephemeral allure. Here are five ways to to achieve this aesthetic.
Option 1 – Vintage Lenses
By using an old, soft lens wide open, a glowy look can be achieved.
This option is perfectly suitable if you want an in-camera look, but it has the disadvantage that you cannot change back to a normal, sharp look in post production.
Option 2 – Tilt-Shift Lens
A tilt-shift lens is a unique lens that allows the plane of acceptable focus to be tilted.
Tilt-shift lenses offer excellent control and at the same time ensure that eyes or other important parts of the image are actually sharp, something that cannot be done with very soft vintage lenses.
The downside is that a professional-grade tilt-shift lens is very expensive and requires practice to use correctly.
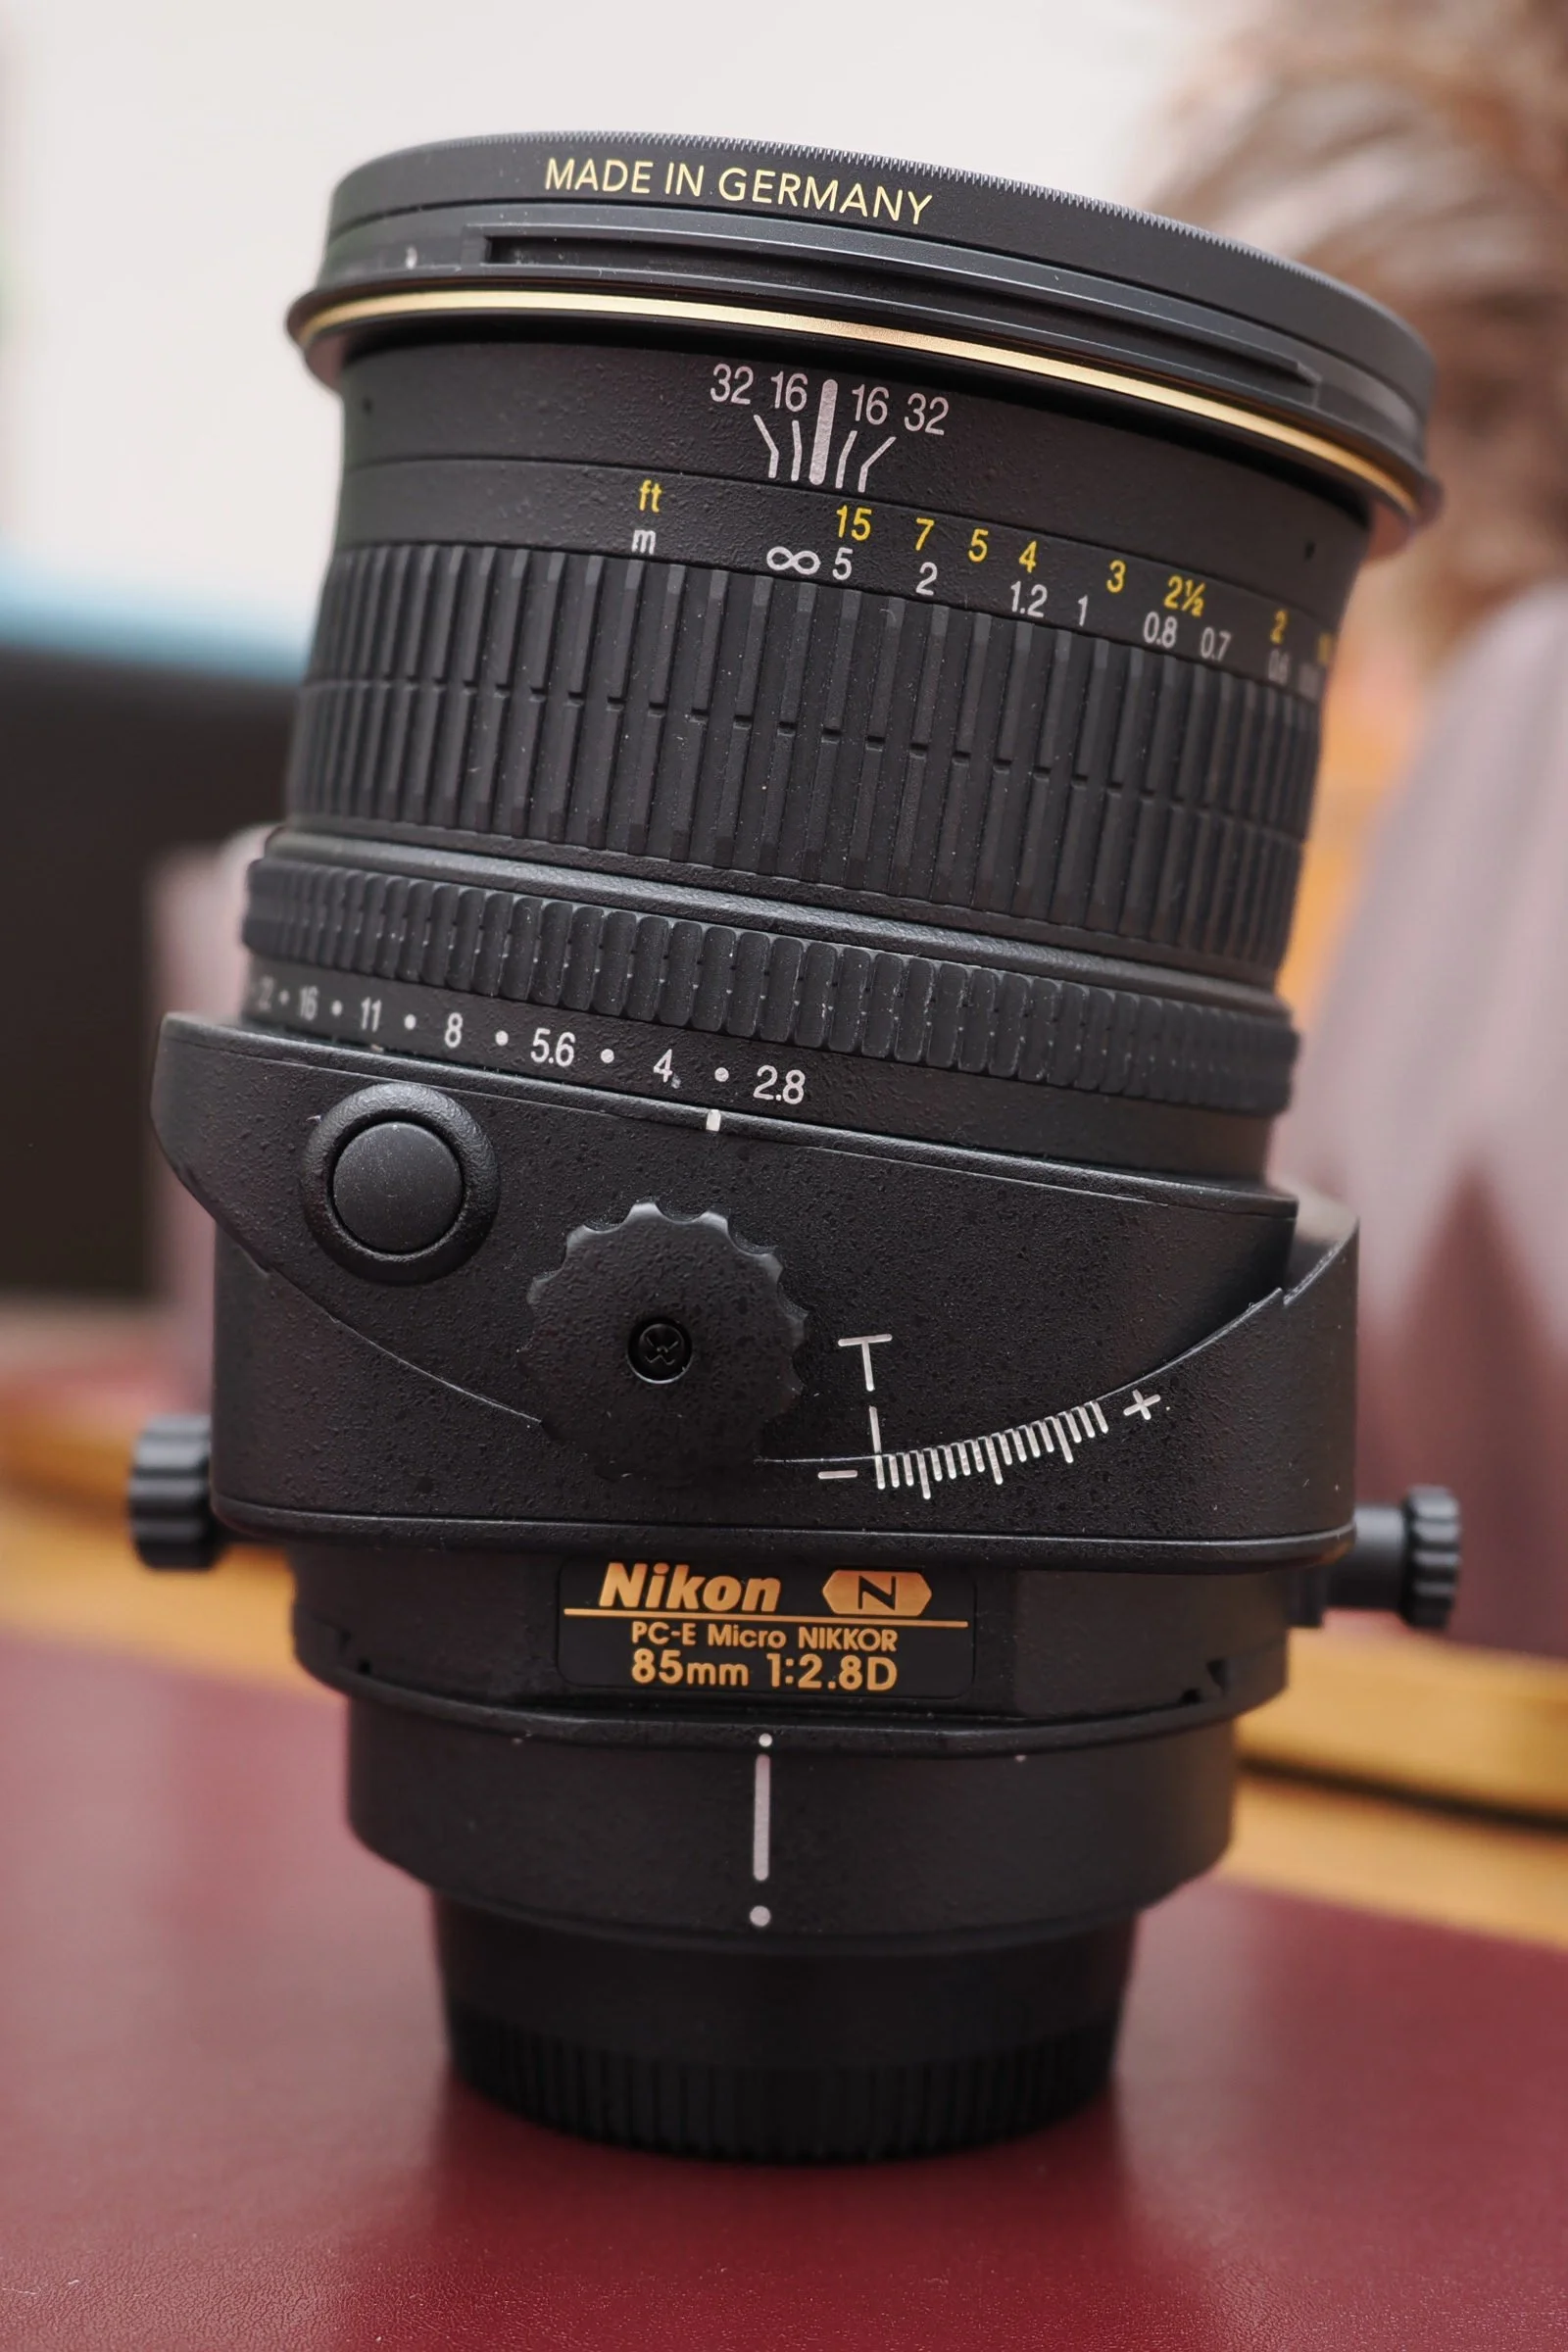
PC-E Micro Nikkor 85mm f/2.8D

Used correctly, the PC-E gives a very subtle, controllable glow-effect.
Option 3 – Lens Whacking
Holding a regular lens in front of the camera’s bayonet results in dreamy images.
I am not a huge fan of this technique, as it is very inconsistent and can therefore be very unnerving for the model and the photographer on set. Be that as it may, it is essentially cost free as it can be done with any lens.

The aperture and exposure has to be set manually as the camera is not connected to the lens.
Option 4 – Using a Soft-Focus Lens
Dedicated soft focus lenses were made for most professional camera systems of the past.
Depending on the system, such a lens can be very expensive and almost certainly hard to find as they were only made in small batches.
Also, their use is pretty limited as they cannot achieve a regular “sharp” look.
The Nikon 105 f/2 DC and the Nikon 135 f/2 DC are not soft focus lenses per se, but can produce such an effect with their Depth of Defocus Control technology.
Option 5 – Digital Post Production
Creating the look in post production gives you the best of both world, as you can always go back and readjust the look.
My preferred method is to use the “Glow” filter effect in ON1 Photo RAW as it offers an abundance of adjustments including the amount of glow as well as halo size combined with various blending modes.
Also, the free smartphone image app Snapseed offers the filter “Glamour Glow” which is capable as well, although nowhere near ON1’s “Glow” filter.

ON1 Photo RAW - “Glow” Filter

Final result - a subtle glow.
Final Remarks
Every method has its own merits and a distinct look that can’t be replicated with a different method.
If you are shooting analog or certain camera types, some of the methods are not feasible. Digital post production always works (given that you scan your film), but also the least “exciting”.
Have fun experimenting, it does not always have to be “tack sharp”.

Why a DSLR in 2022
Not Exactly Hyped
Let’s be honest, if you want to be part of the cool kids gang in 2022, you have to get a MILC, not a DSLR.
And this is exactly why you should get a DSLR in 2022, because this makes you the edgy kid on the block.
Value for Money
DSLRs offer incredible value for money, especially when you look at the used market. Many photographers are selling their DSLR kits, and most of them are amateurs who did not really push their cameras towards 100.000 shutter actuations.
User Experience
If you are fed up with looking at a computer screen all day, a DSLR is just the solution to your problems. Apart from a Leica M digital rangefinder, there is no other digital camera type that can provide a user experience as similar to an analog camera.
No Overheating
I know this is a controversial issue and some photographers bashed me in the past for bringing it up, but it is true that MILCs are more prone to overheating than DSLRs. Yes, it only happens in very warm conditions, but it happens – that is undeniable.
Size and Weight
MILCs are smaller and lighter than DSLRs, but not that much, especially if you take bulky mirrorless lenses into consideration.
If you really want to save weight and space, you have to pick a smaller sensor format, like MicroFourThirds. The minimal difference when picking a full frame MILC over a full frame DSLR does not justify the extra cost in my opinion.

Compact done well - a MILC Olympus OM-D M5 classic.
Some Recommended DSLRs
There are many awesome DSLRs, both new and old. The great news is that even the old models have very capable AF and usually more than good enough imaging performance. Be that as it may, the following models are favourites of mine that I can recommend wholeheartedly:
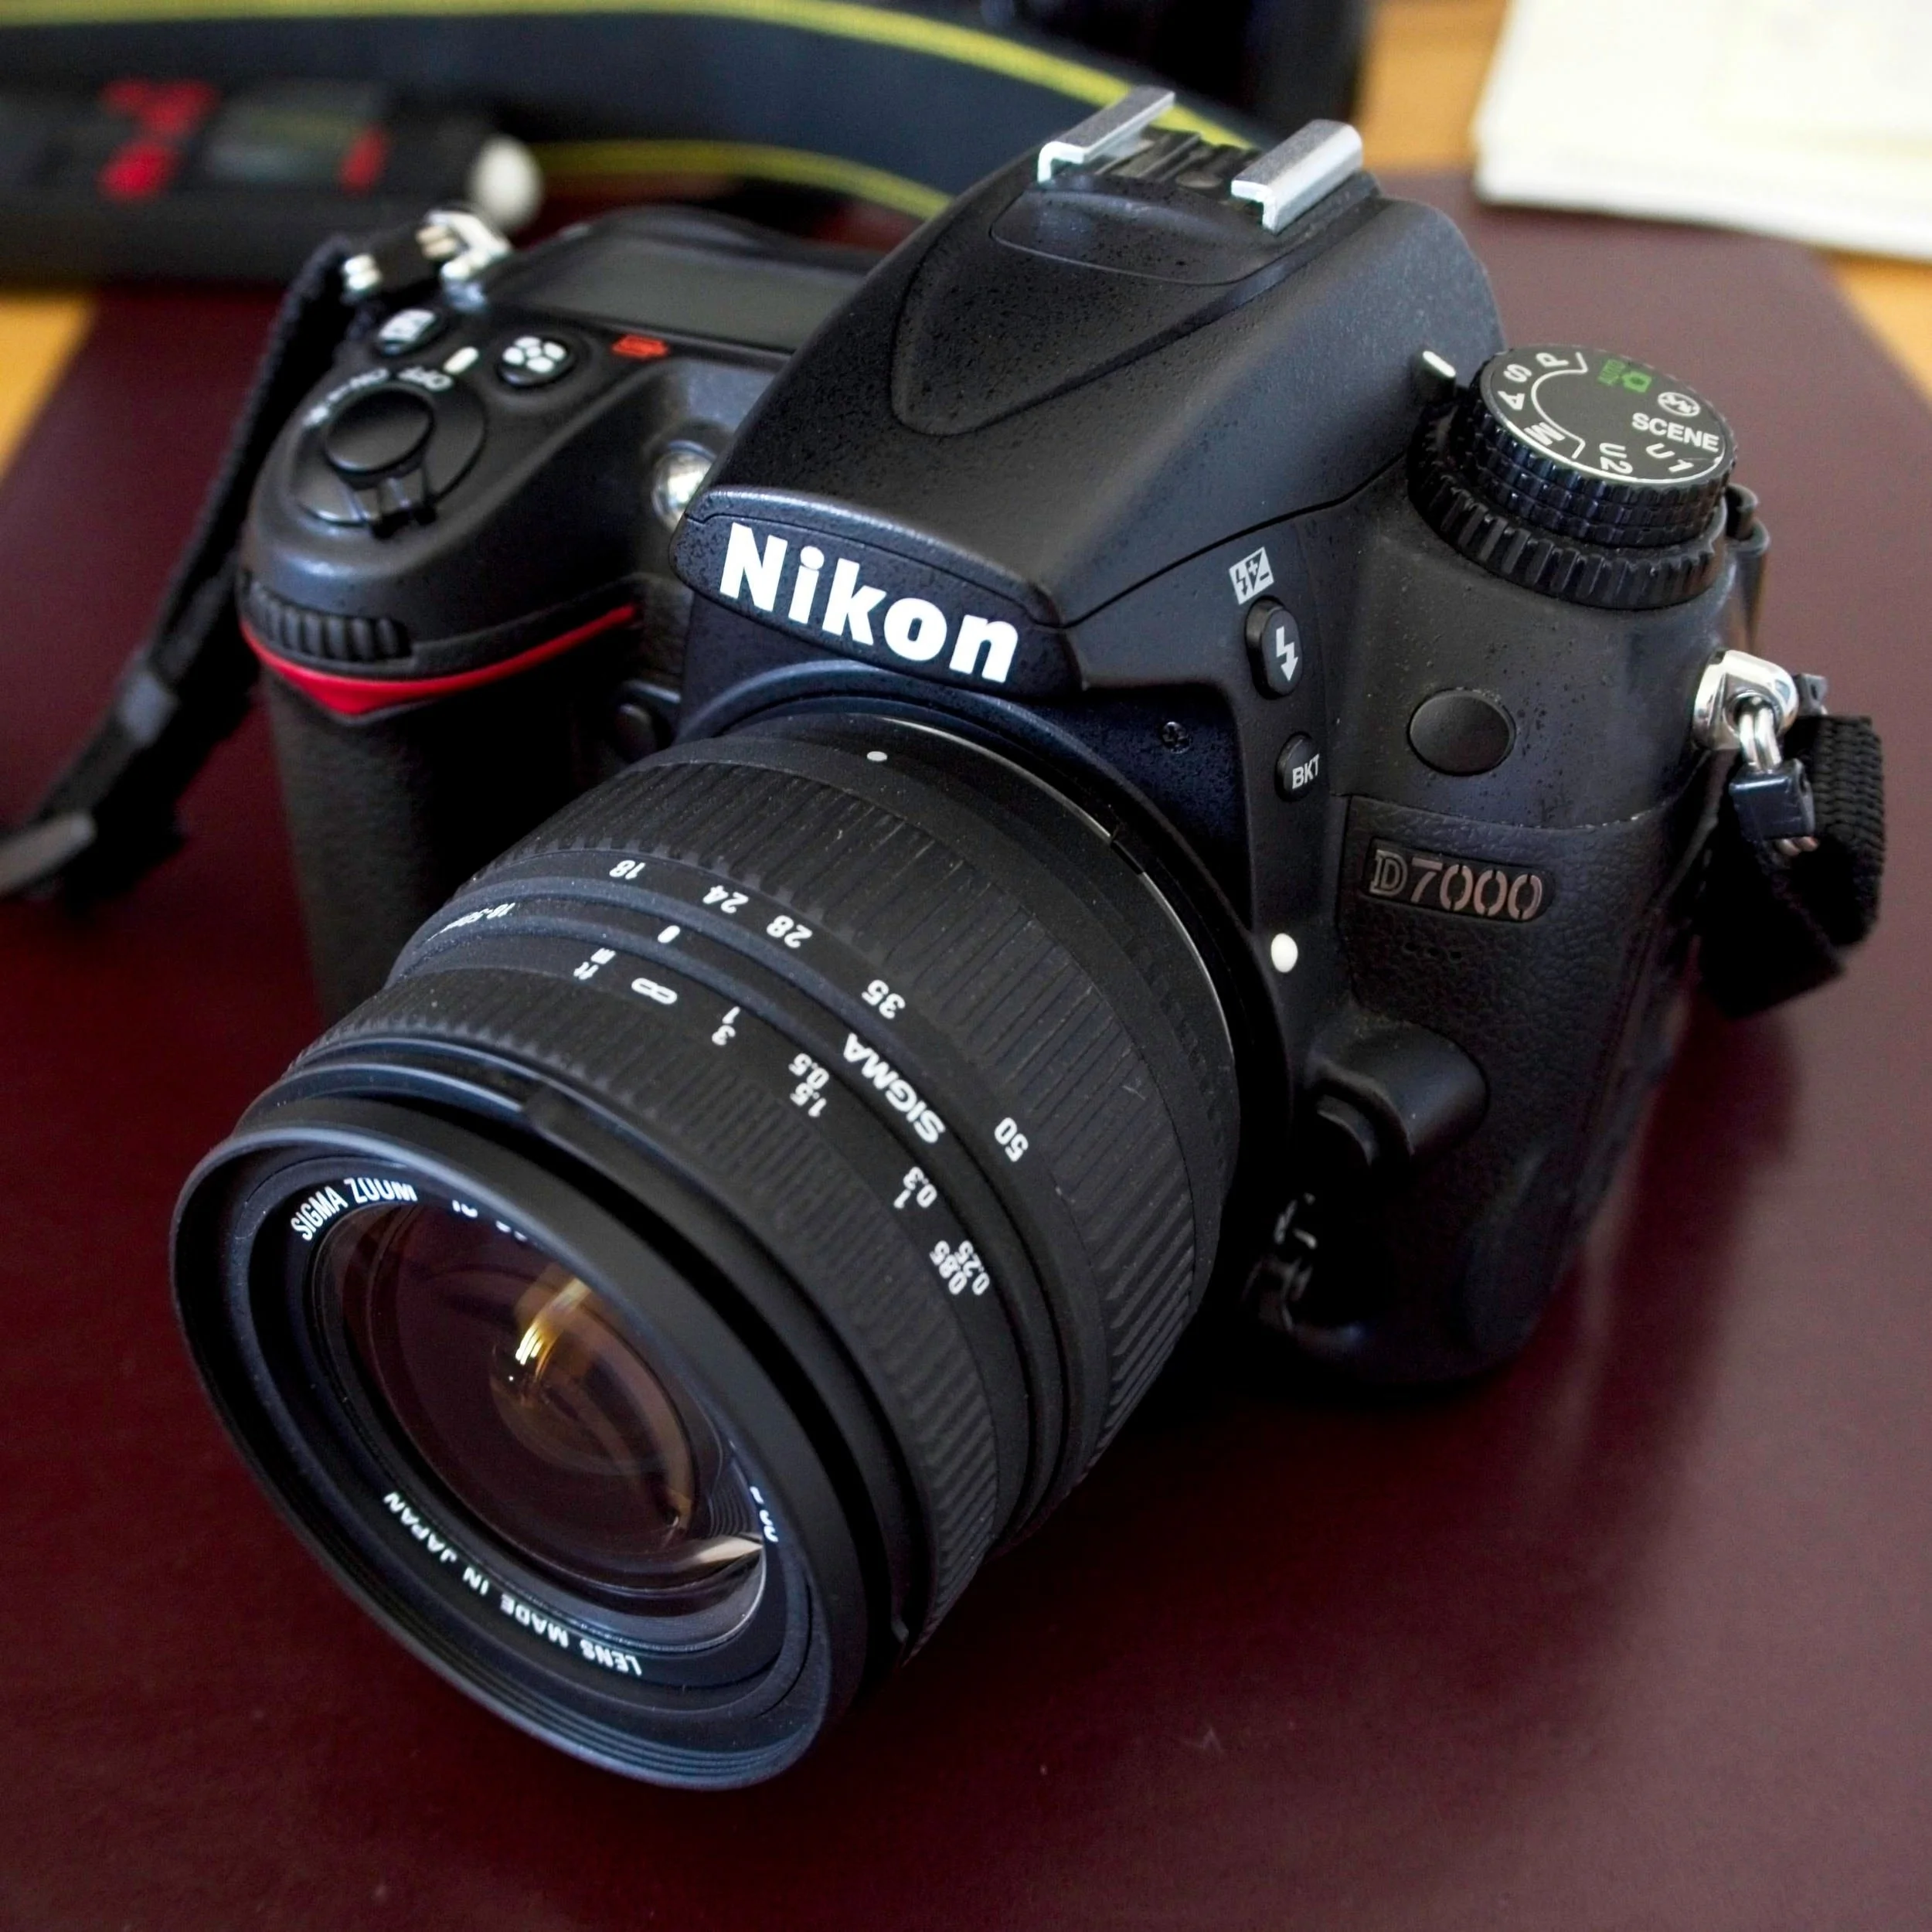
Nikon D7000
A 16.2 MP APS-C DSLR from Nikon with two card slots, very capable autofocus and incredibly low price point – that is the Nikon D7000. I got mine for 150 € with a Sigma zoom lens. Even today, the D7000 can be used in commercial and private scenarios without a second thought.
Nikon D700
The legendary 12 MP DSLR that made full frame accessible for the masses – Click here for my review.
Nikon D800
Only slightly more expensive than the Nikon D700, the Nikon D800 is probably the most underrated beast of a camera currently available on the used market. Get one before more photographers find out how good this new classic actually is.

Pentax 645Z
Another legendary camera that packs a serious punch – the Pentax 645Z gives access to medium format digital photography and the incredible lineup of Pentax 645 lenses dating back to the days of Pentax film bodies.
Final Thoughts
I love analog things, so it is only natural for me to also work with DSLRs. Admittedly, I also really like MILCs, not because they are better or smaller, but because they are different. Both camera types have their strengths and weaknesses, and it is important to pick the tool not based on what the manufacturers want to sell but on what actually suits your photography.

Repairability, Service Life and Sustainability
When choosing a camera brand, we photographers mostly look at specifications, brand appeal and lens selection.
Be that as it may, if you want to stick with one camera system for many years, the service life and repairability have to be taken into account.
As I’ve just got back a bunch of items from Nikon service, I thought it is time to share my experiences not only with Nikon but with other brands as well.

Three Types of Service
As a consumer, you can essentially run into three scenarios.
In the first scenario, the camera or lens is still in production. This was the case with the Nikkor 28m f/1.4E. Manufacturers are essentially obliged to offer repairs and replacements by law. Interestingly, even there are differences. Olympus – now OM Systems, Nikon and Leica – offer genuine repairs, meaning they take the product apart and try to fix it. Some other manufacturers simply trash the defective item and send you a replacement.
In the second scenario, the camera or lens is no longer in production but still sold in stores. This was the case with the 20mm f/2.8 AF-D. When you send such a product to Nikon, they put a little remark on the bill stating that they cannot guarantee spare parts being available for the product in the future. This means that they still have the necessary parts, but might run out in the future.
In the third scenario, the camera or lens are out of production and no longer sold new and the manufacturer has no longer all spare parts in stock. This was the case with the Nikon FM3A. Nikon notified me that they do not have any parts left. According to my experience, Nikon puts this note in there when they no longer have all the spare parts. It can be quite possible that they still have most or at least some spare parts somewhere.
The last two situations are where the wheat is sorted from the chaff. Most manufacturers won’t even inspect equipment outside a certain period. I once attempted to send an old Olympus DSLR – the E1 – to the manufacturer, and they unfortunately refused to do so, because it was outside the service period.
Two manufactures really deserve an honourable mention, and those are Nikon and Leica.
Leica accepts most cameras for service, while Nikon accepts every camera ever made by them for service. If the equipment needs CLA or minor repairs that do not need spare parts, then they both will attempt to fix it.
Regarding Leica, they are as of 2022 no longer servicing any R-cameras.
Food for Thought
While basic analogue cameras can be repaired by many trained technicians, having excellent support is essential for digital cameras. Many issues they might run into require specialized knowledge.
Choosing a manufacturer that provides parts and repair service for many years helps to protect the environment, save money and connect with the camera in your hand. Because no one wants to shoot with a disposable camera.